

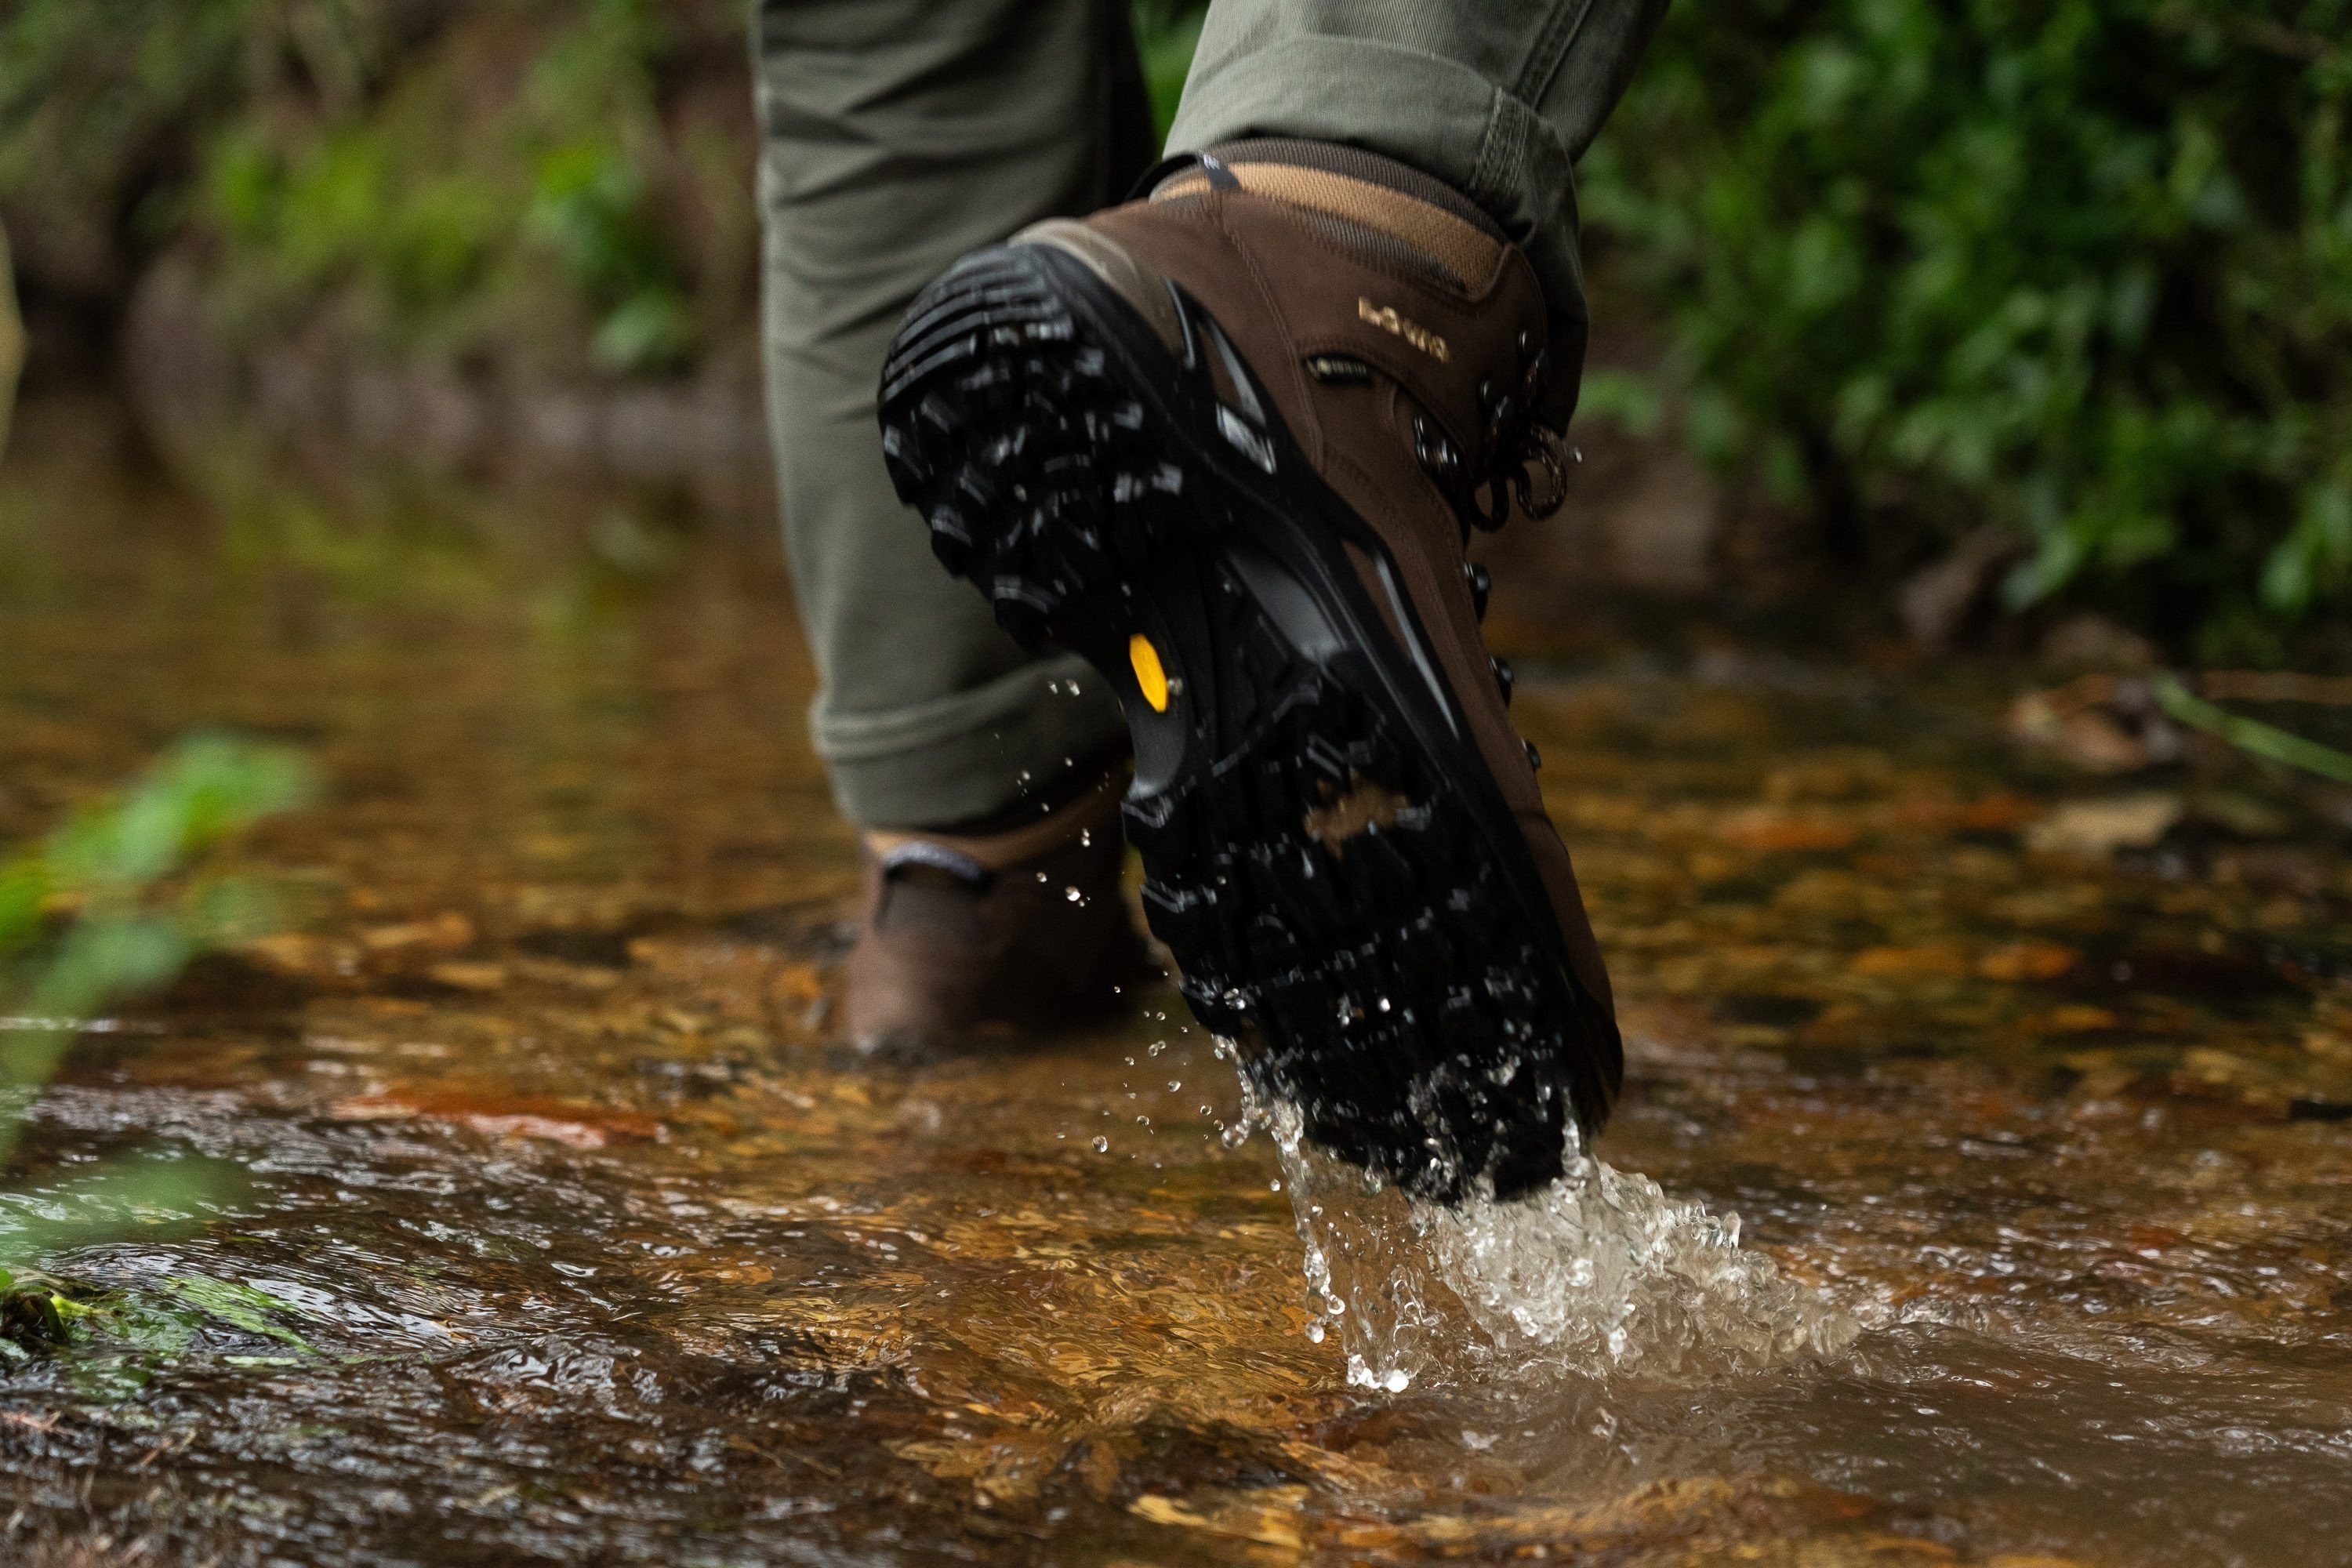
2 features to look for in waterproof hiking boots
Use waterproof hiking boots when you know you will be hiking in very wet weather. Wet weather means
- You want your feet to stay dry at all times, and
- You need a superb grip so you don’t slip.
Because of this, you should look for 2 must-have features in waterproof hiking boots:
- Waterproof upper. Here, we also suggest boots with gusseted tongues because they prevent the debris and snow from getting inside the boot, and if you plan to hike in deep snow, consider getting waterproof gaiters as well. They can’t hurt, they can only help in that case.
- Lugs (grip) that will keep you safe and planted on the hike. Go for deep lugs (4 mm or deeper) if you plan to hike in mud/slush/snow, and choose shallower lugs if you plan to hike on harder surfaces.
When NOT to use waterproof hiking boots
If only light rain is in the forecast or it’s a bit of wet grass and nothing else, consider getting water-repellent, water-resistant, or regular hiking boots. There are a few reasons why it’s best you’re sure you need waterproof hiking boots:
- Waterproof hiking boots don’t breathe well. And if the water gets inside (your feet sweat), there’s no way for it to get out.
- They are more expensive because waterproof membranes are not cheap.
You might be OK with a lower level of protection against water.
Consult this table:
| Water-resistant | Water-repellent | Waterproof | |
| General characteristics | a tightly woven fabric that is naturally capable of resisting water upon contact | fabric treated with durable water-repellent (DWR) or hydrophobic chemicals | -fabric treated with DWR -have waterproofing membranes like Gore-Tex and OutDry -have seam-sealed construction for extra protection |
| Water protection level | low water protection | moderate water protection | high water protection |
| Water pressure resistance | 0-5000 mm (no pressure or moisture) | 6000-10000 mm (light pressure) | 10000-20000 mm (high to very high pressure) |
| Weather conditions best used in | light rain shower and dry snow | light rain and average snow | moderate to heavy rain and average to wet snow |
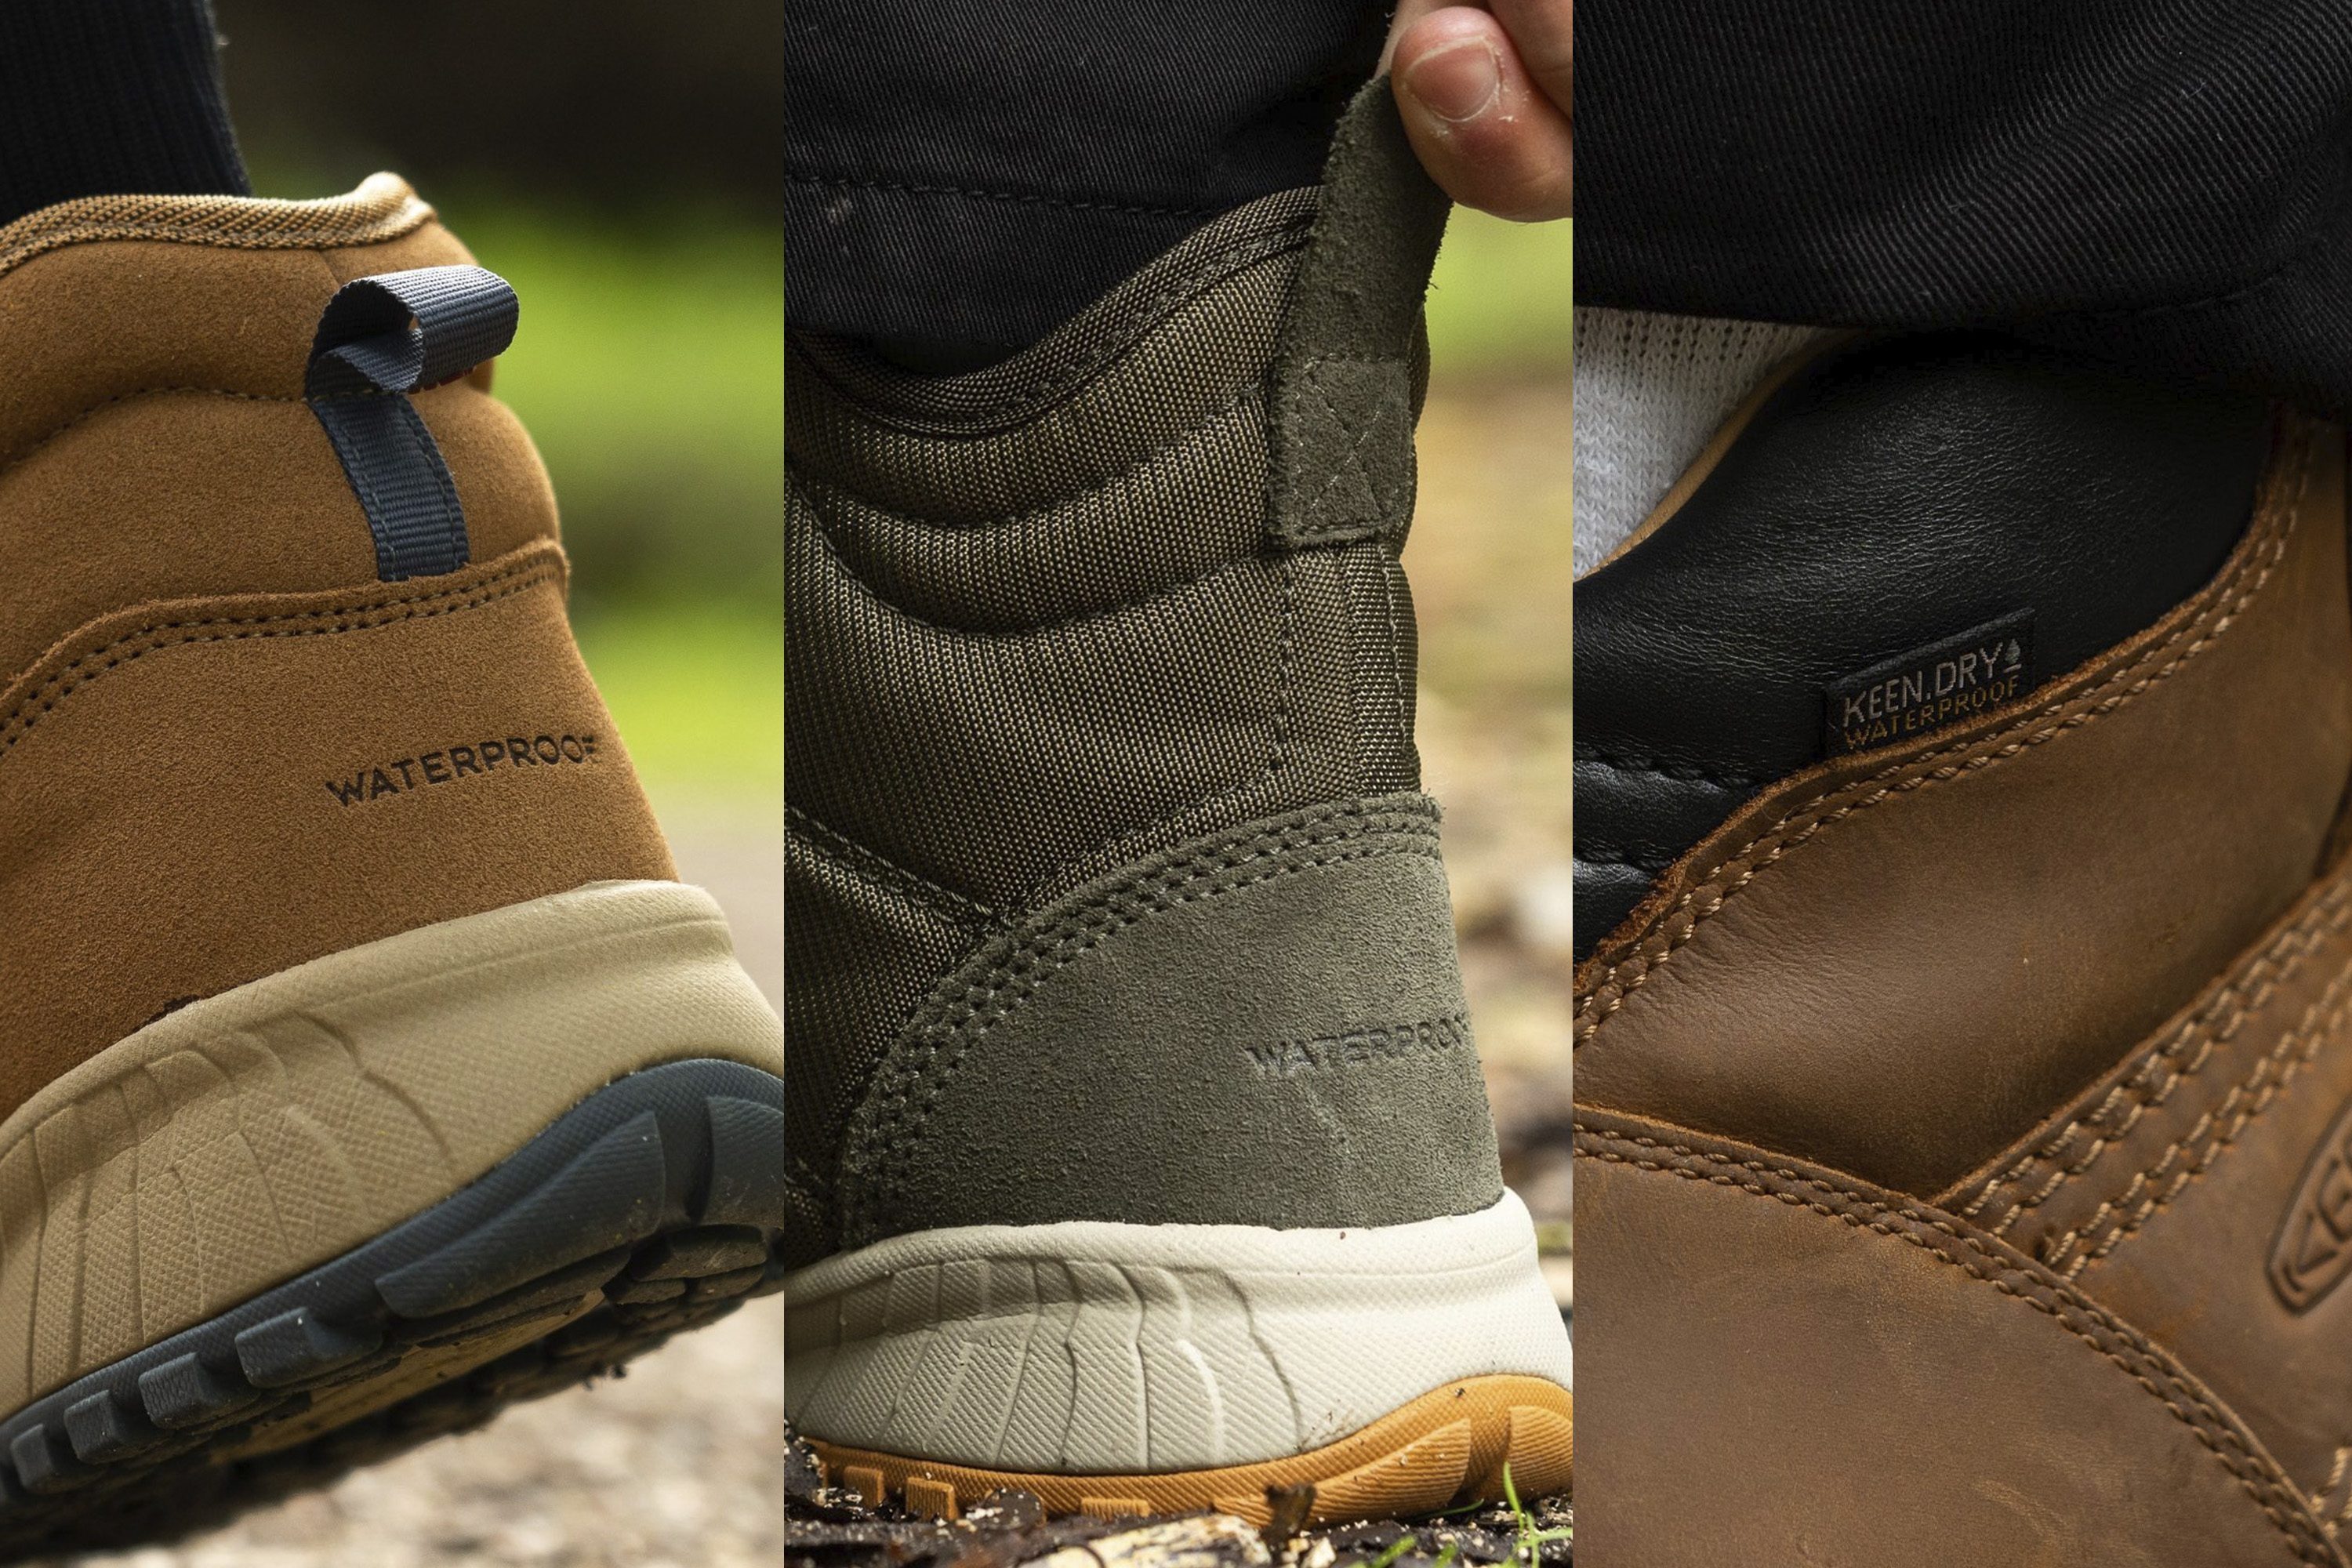
How to recognize waterproof hiking boots
Waterproof hiking boots have a waterproof membrane laminated with the upper material. The most common waterproof material is called Gore-Tex or GTX. However, it is not the only waterproof material present in hiking footwear. Many brands develop their own waterproof membrane but all of them specify on the box (and, often, on the shoe) that it is waterproof.
Best to look for a) the name of the waterproof membrane or b) “waterproof” or “WP” on the shoe or on its box.
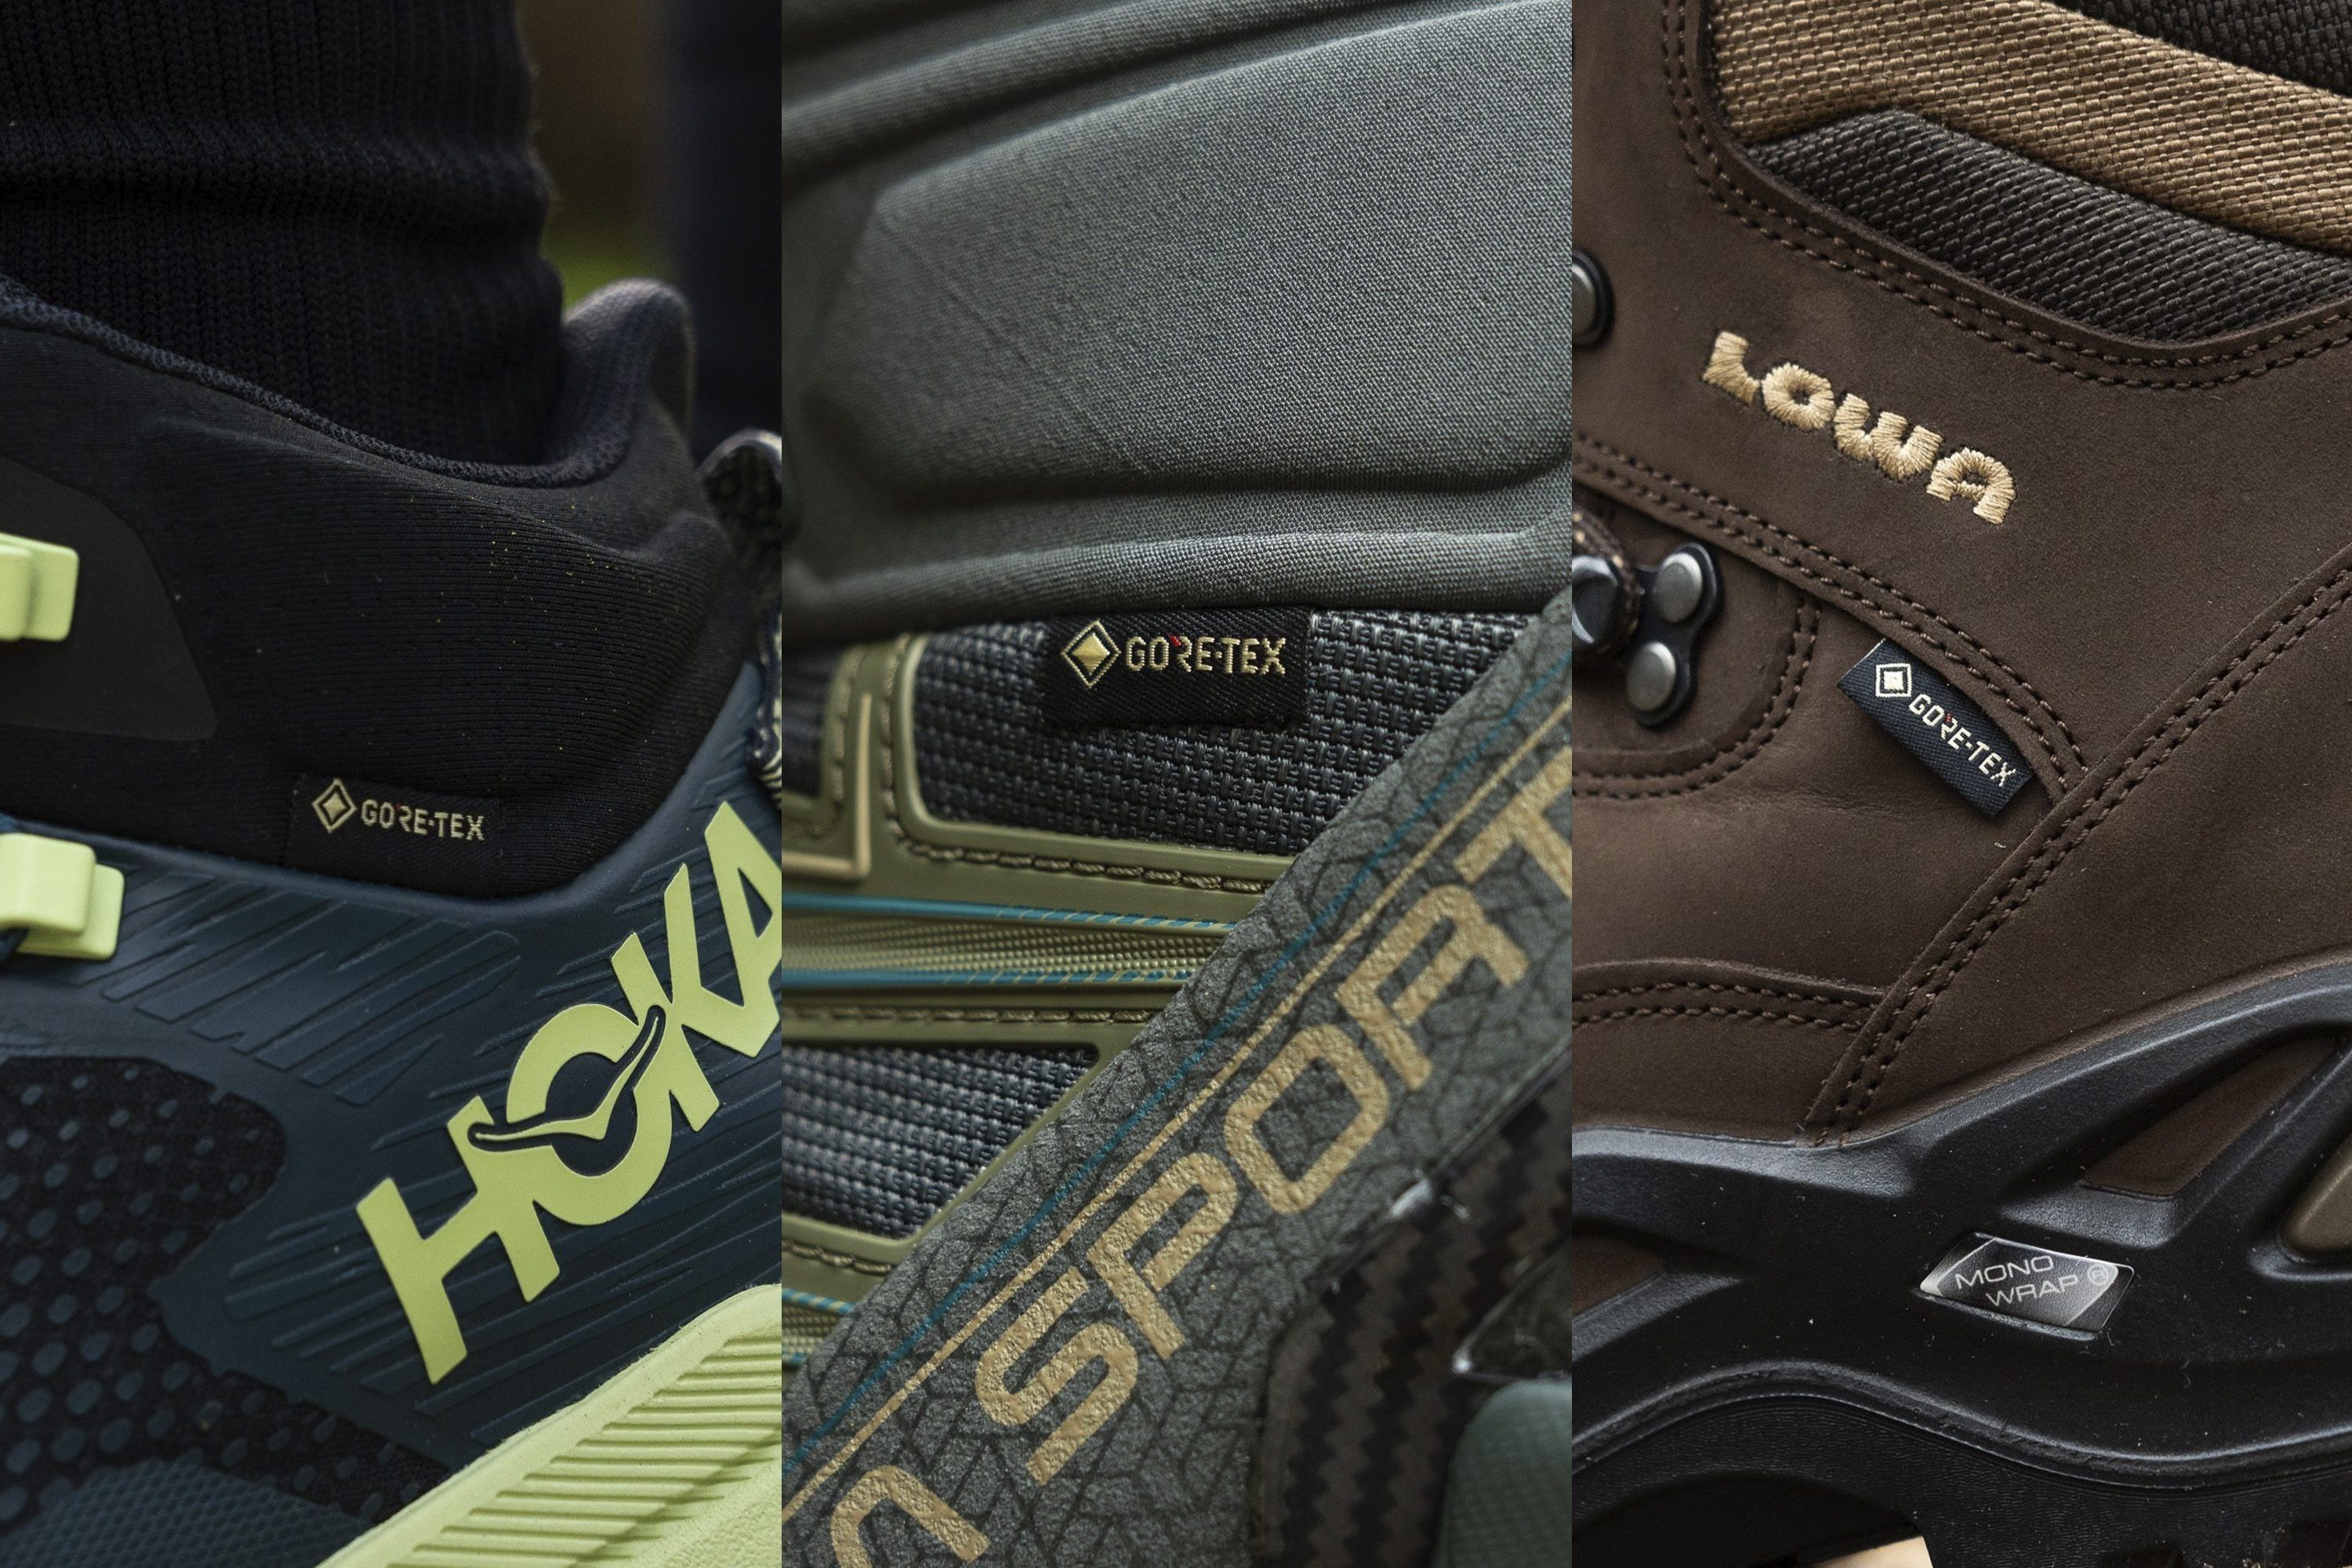
A few other examples of waterproof materials:
- KEEN.Dry waterproof lining present in KEEN hiking footwear
- Omni-Tech used in Columbia hiking boots
- DannerDry waterproof membrane by Danner
that you can also look for on the shoe itself (or its box).
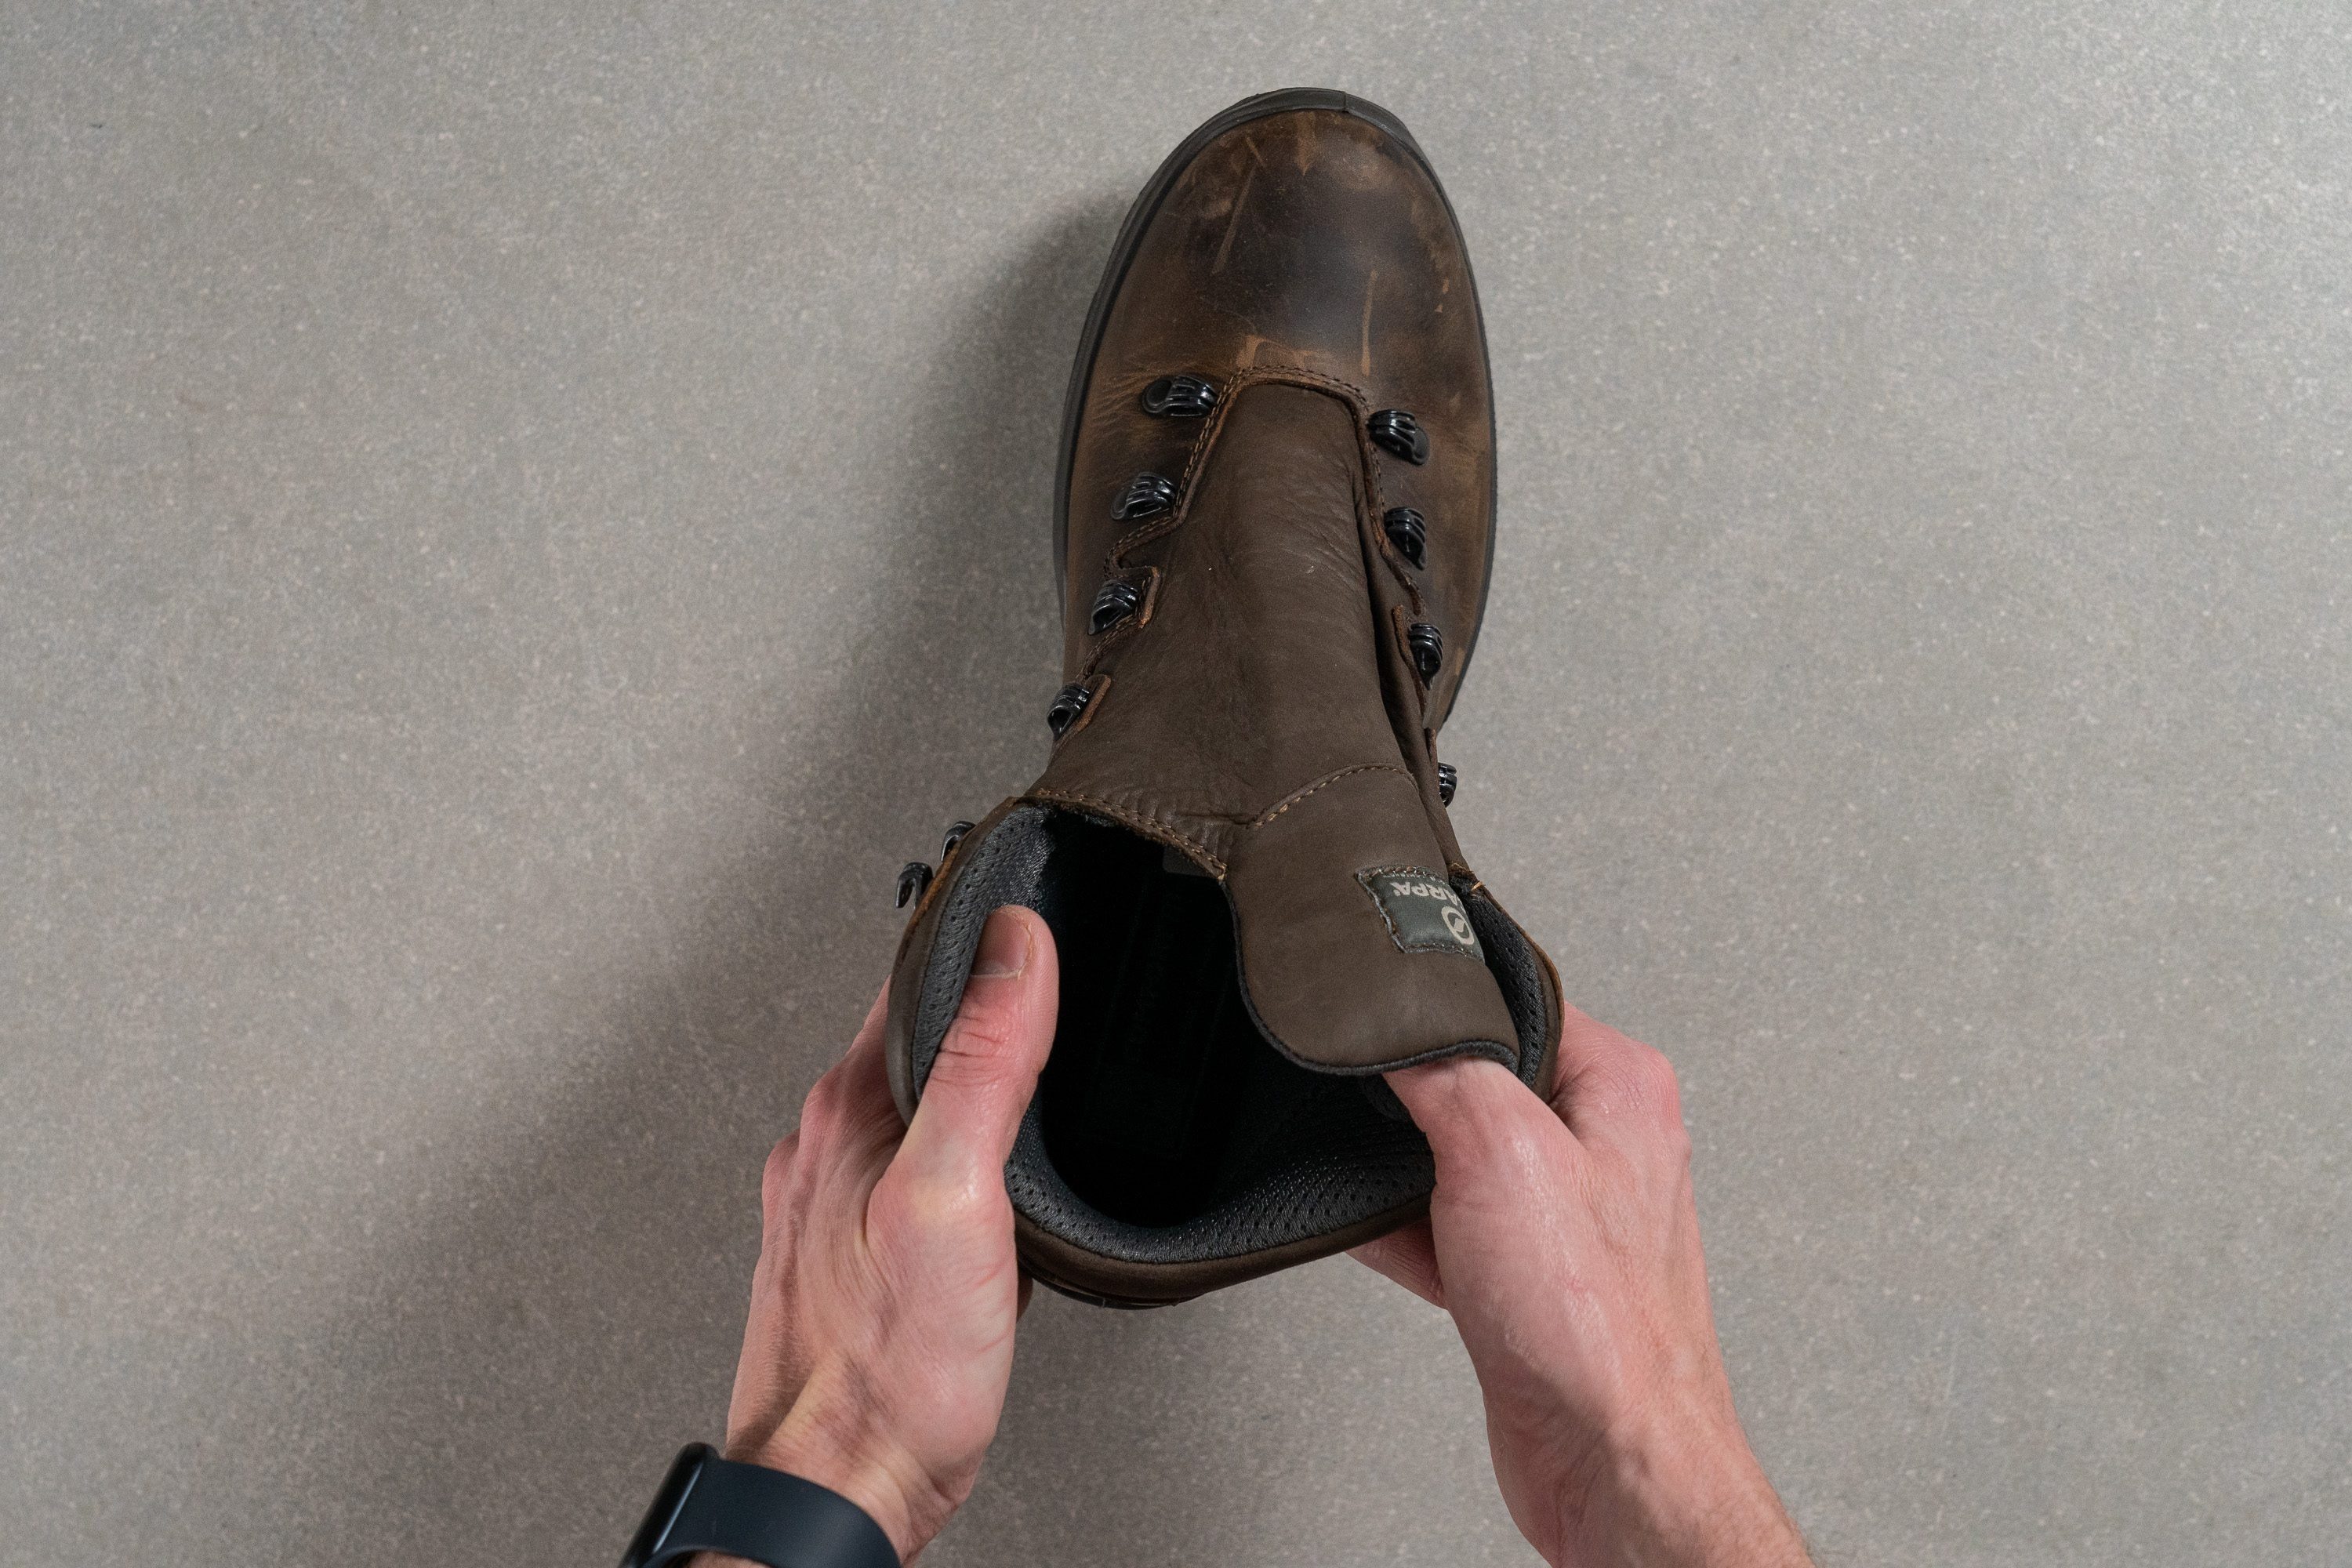
Gusseted tongues and gaiters: Double yes
Tongue can be:
- free (not connected to the sides of the boot, only to the toebox)
- Semi-gusseted (connected to 1 side of the boot)
- Gusseted (connected to both sides of the boot, below the eyelets).
Gusseted tongues do a great job at keeping the debris and water (slush, snow, mud) outside of your boots.
However, if you know that you’ll be hiking in very wet weather, consider upping the ante with the gaiters. They also come in waterproof variants (GTX or other materials) and are great at keeping your feet and lower legs dry!
WORST breathability results in waterproof hiking boots
We test all the hiking boots on our test hikes and in our lab. This allows us to have a complete picture of how a certain boot feels and performs. When it comes to breathability, we perform a standardized test on all boots which lets us rate the breathability on a 1-5 scale.
We use a smoke machine and pump the smoke into the boot. Then, we watch as the smoke comes out: where it comes out and at which pace. In non-breathable shoes (breathability rating: 1) the smoke does not come out or only some of it comes out, usually not through the toebox where breathable boots would breathe.
Unlike regular hiking boots, waterproof ones have an extra layer: waterproof membrane. Although manufacturers like Gore-Tex claim that their materials are breathable, we’ve seen it again and again that they are not. Or at least not enough to be compared to the regular materials who can rate 4/5 and 5/5 on our breathability test.
What also does not help with breathability is the padding on the tongue. While it’s great to have it, because it provides additional warmth and prevents a lace bite when you tighten the laces, it might cause additional sweating when too thick and the boots are not used in very cold weather.
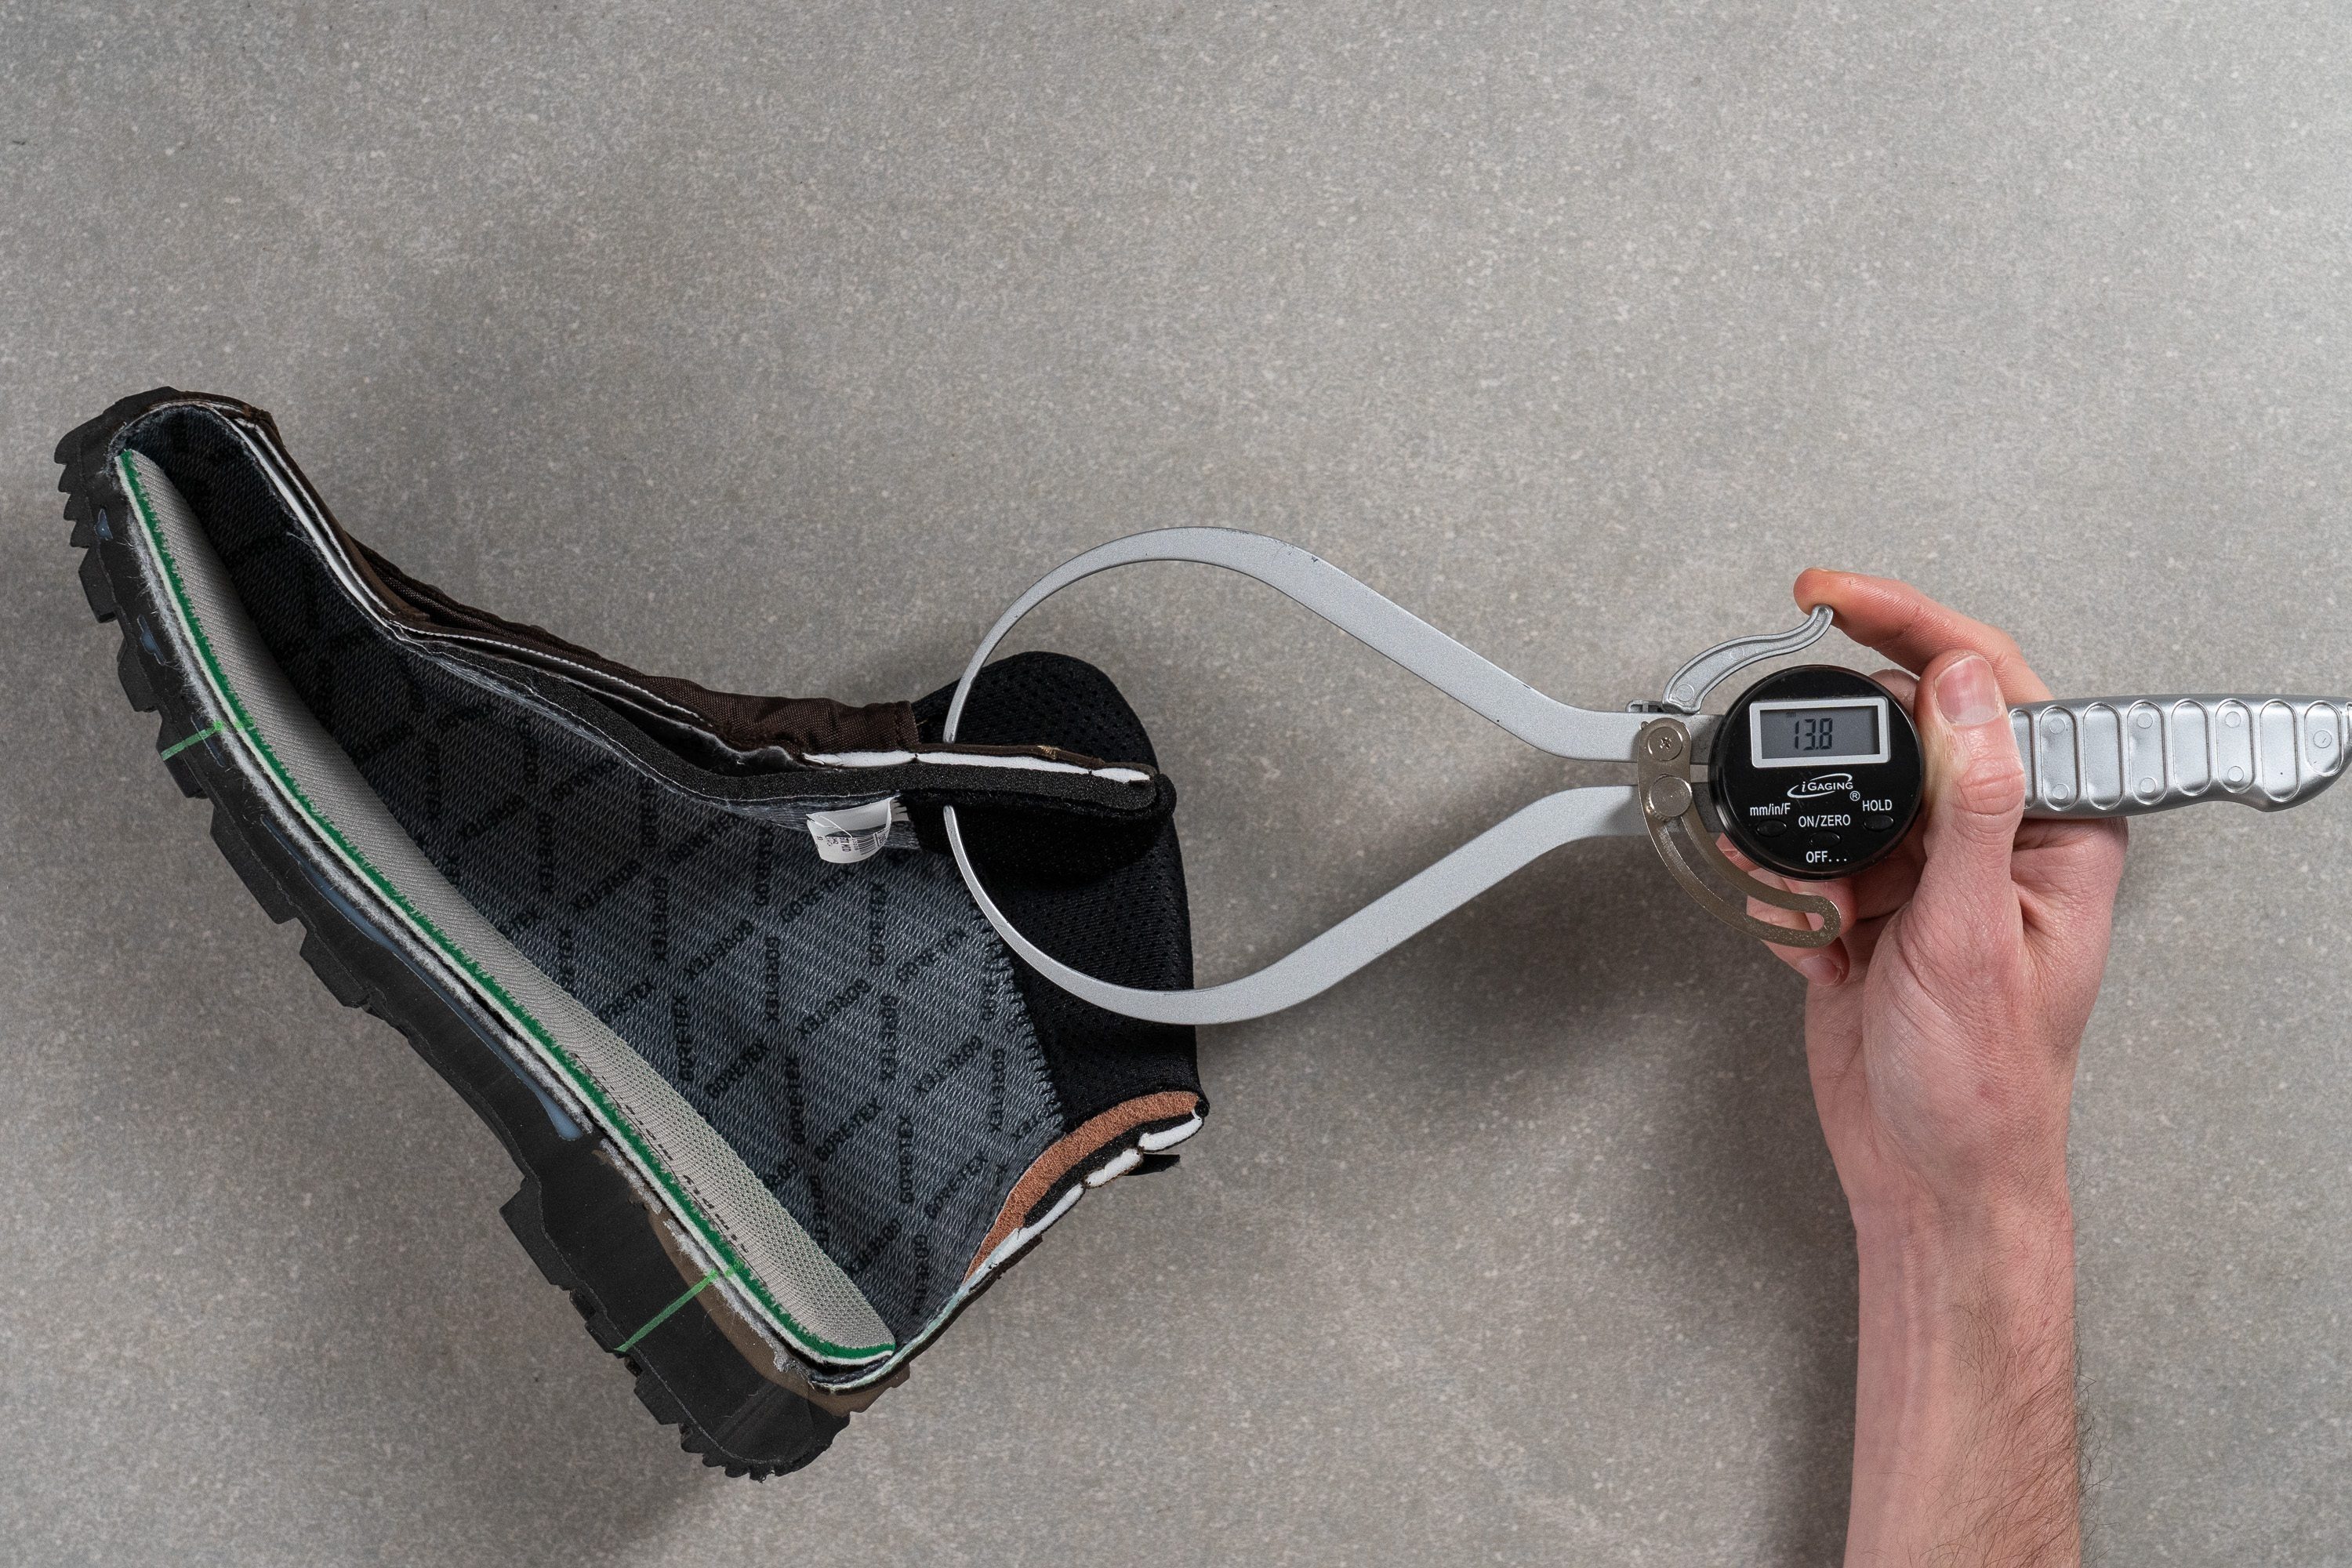
If you find this curious, look for our measurements in hiking boot reviews. We use a digital caliper to measure the padding and note it down.
Waterproof material under the microscope
A part of doing our breathability test is looking at the upper under the microscope.
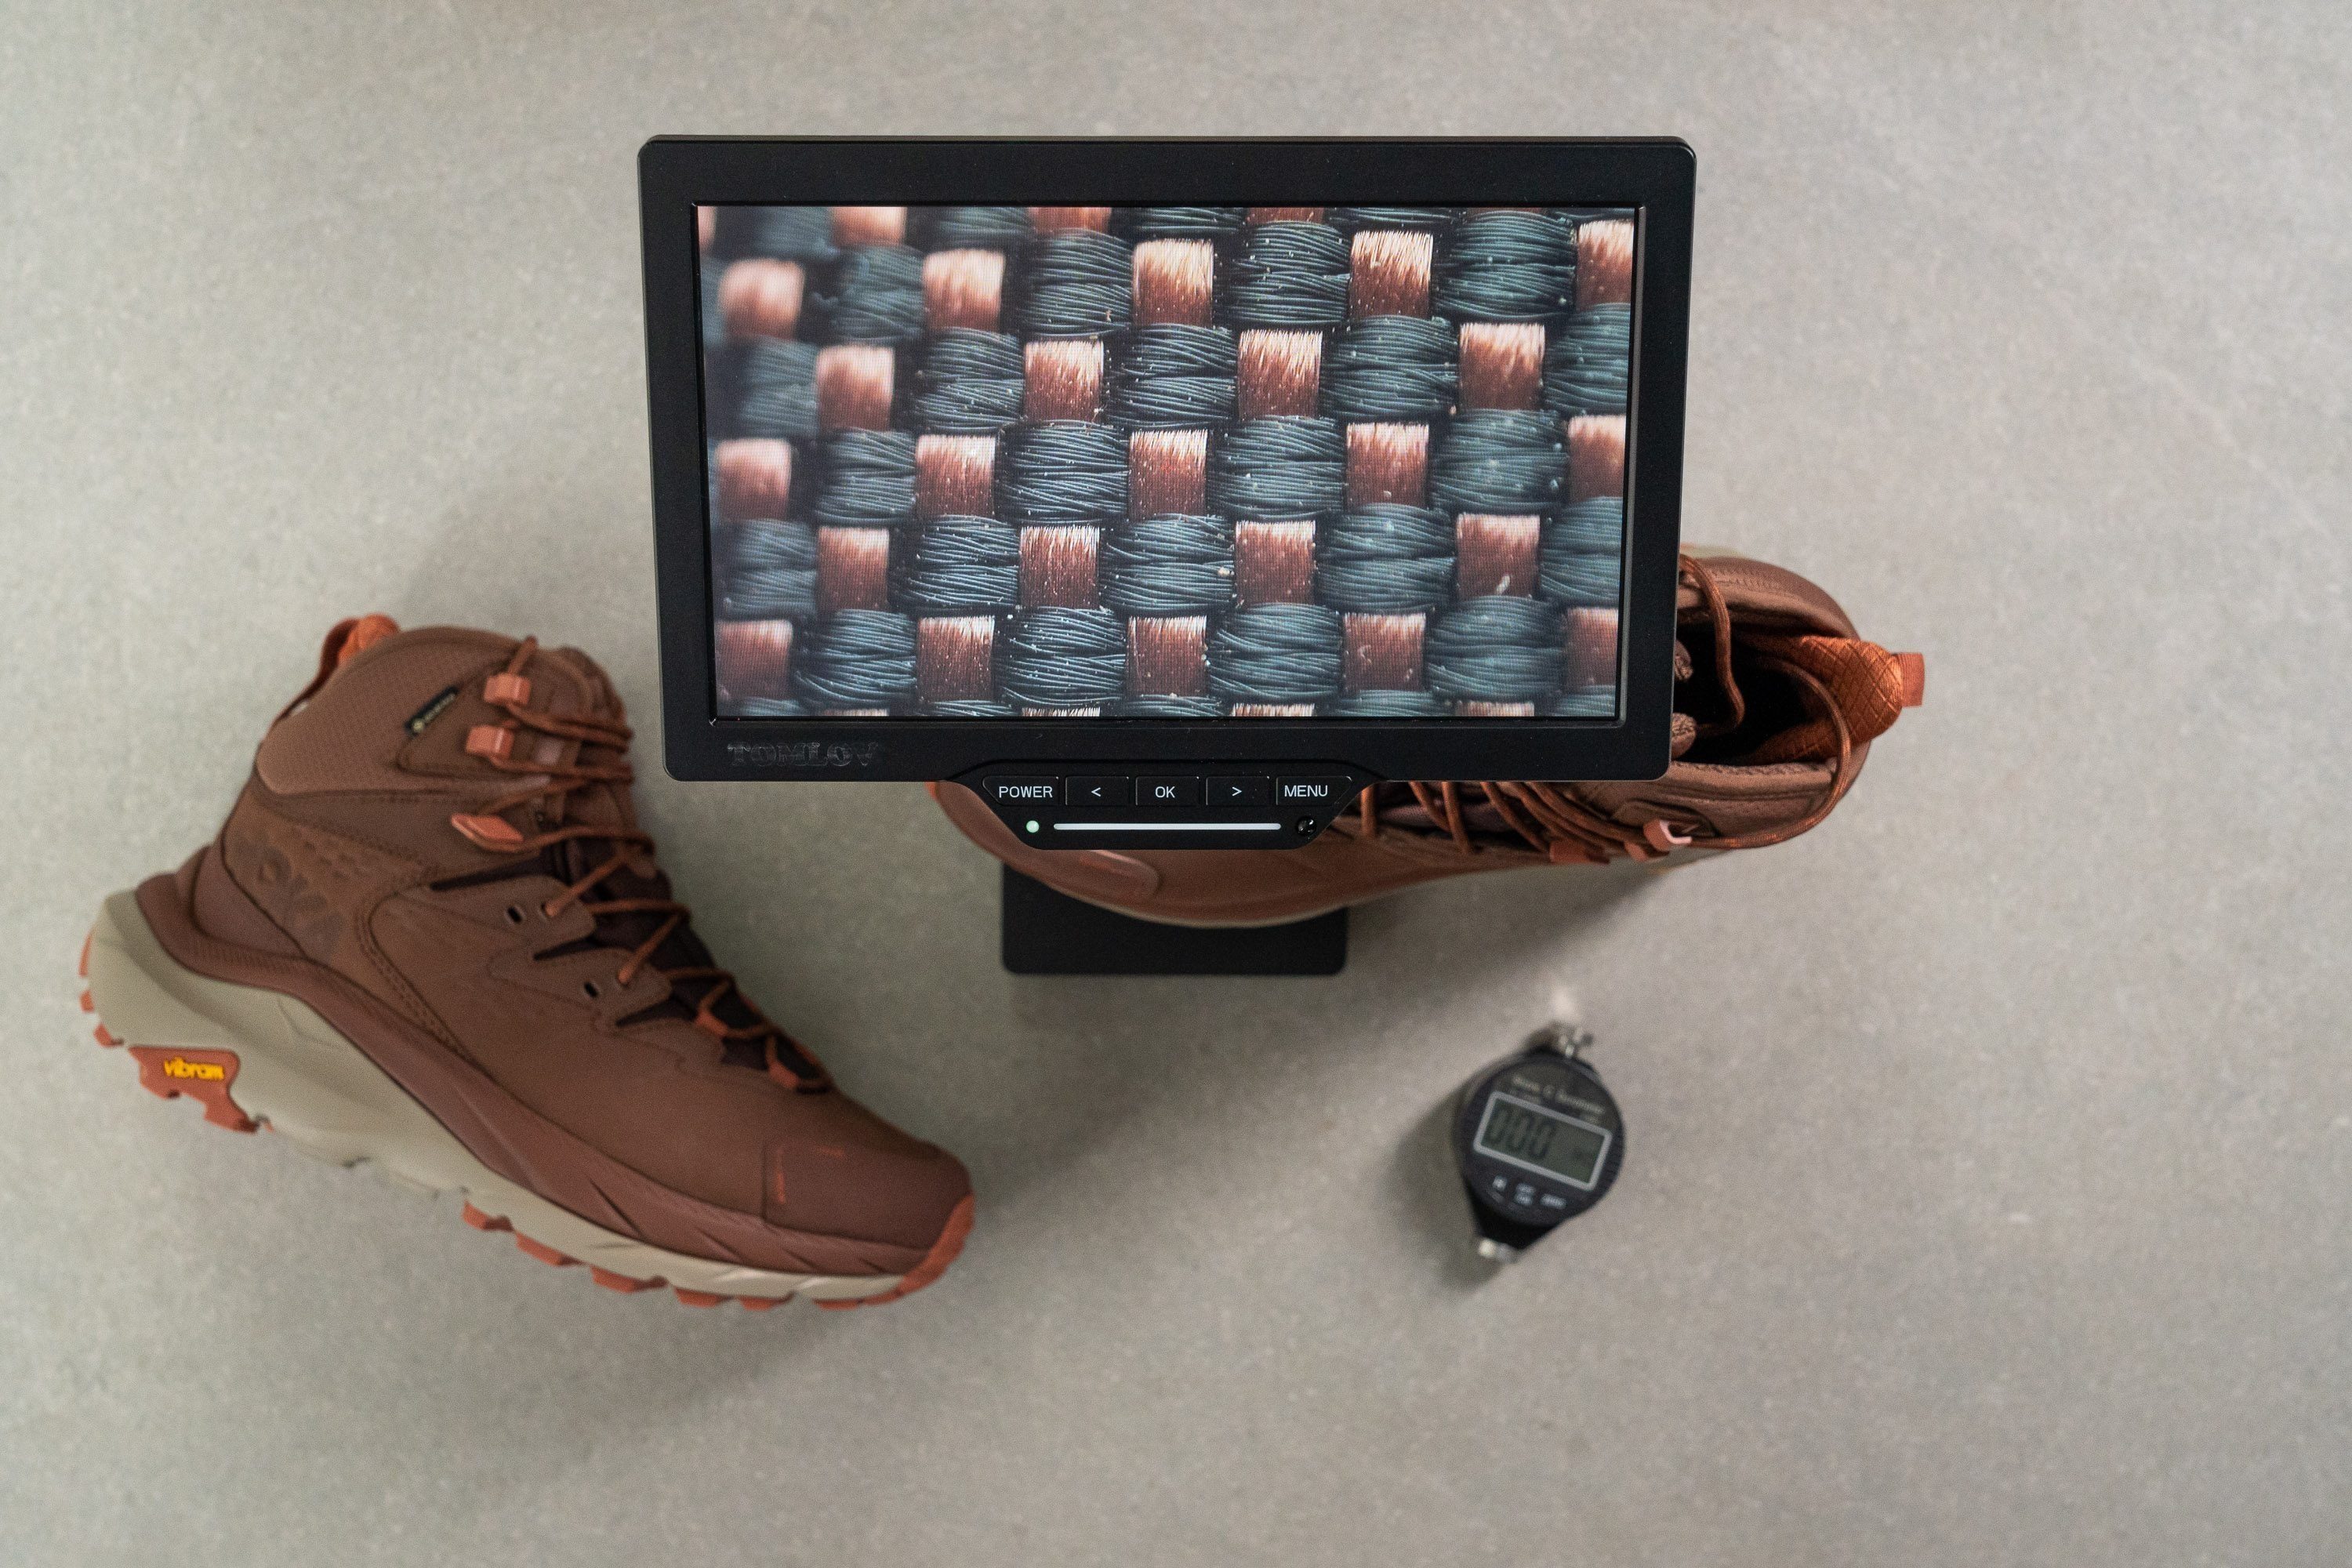
This allows us to see how breathable, non-waterproof uppers have a more loose structure and sometimes even ventilation holes. With waterproof uppers, it is just the opposite.

This only confirms what we’ve seen on the smoke test.
How not to slip in waterproof hiking boots
First, you should know what type of terrain you’re going to cover. It’s obviously going to be wet, but are we talking about soft ground or hard ground? Rocks or mud?
Here are our general guidelines, backed by hundreds of wear tests and lab tests:
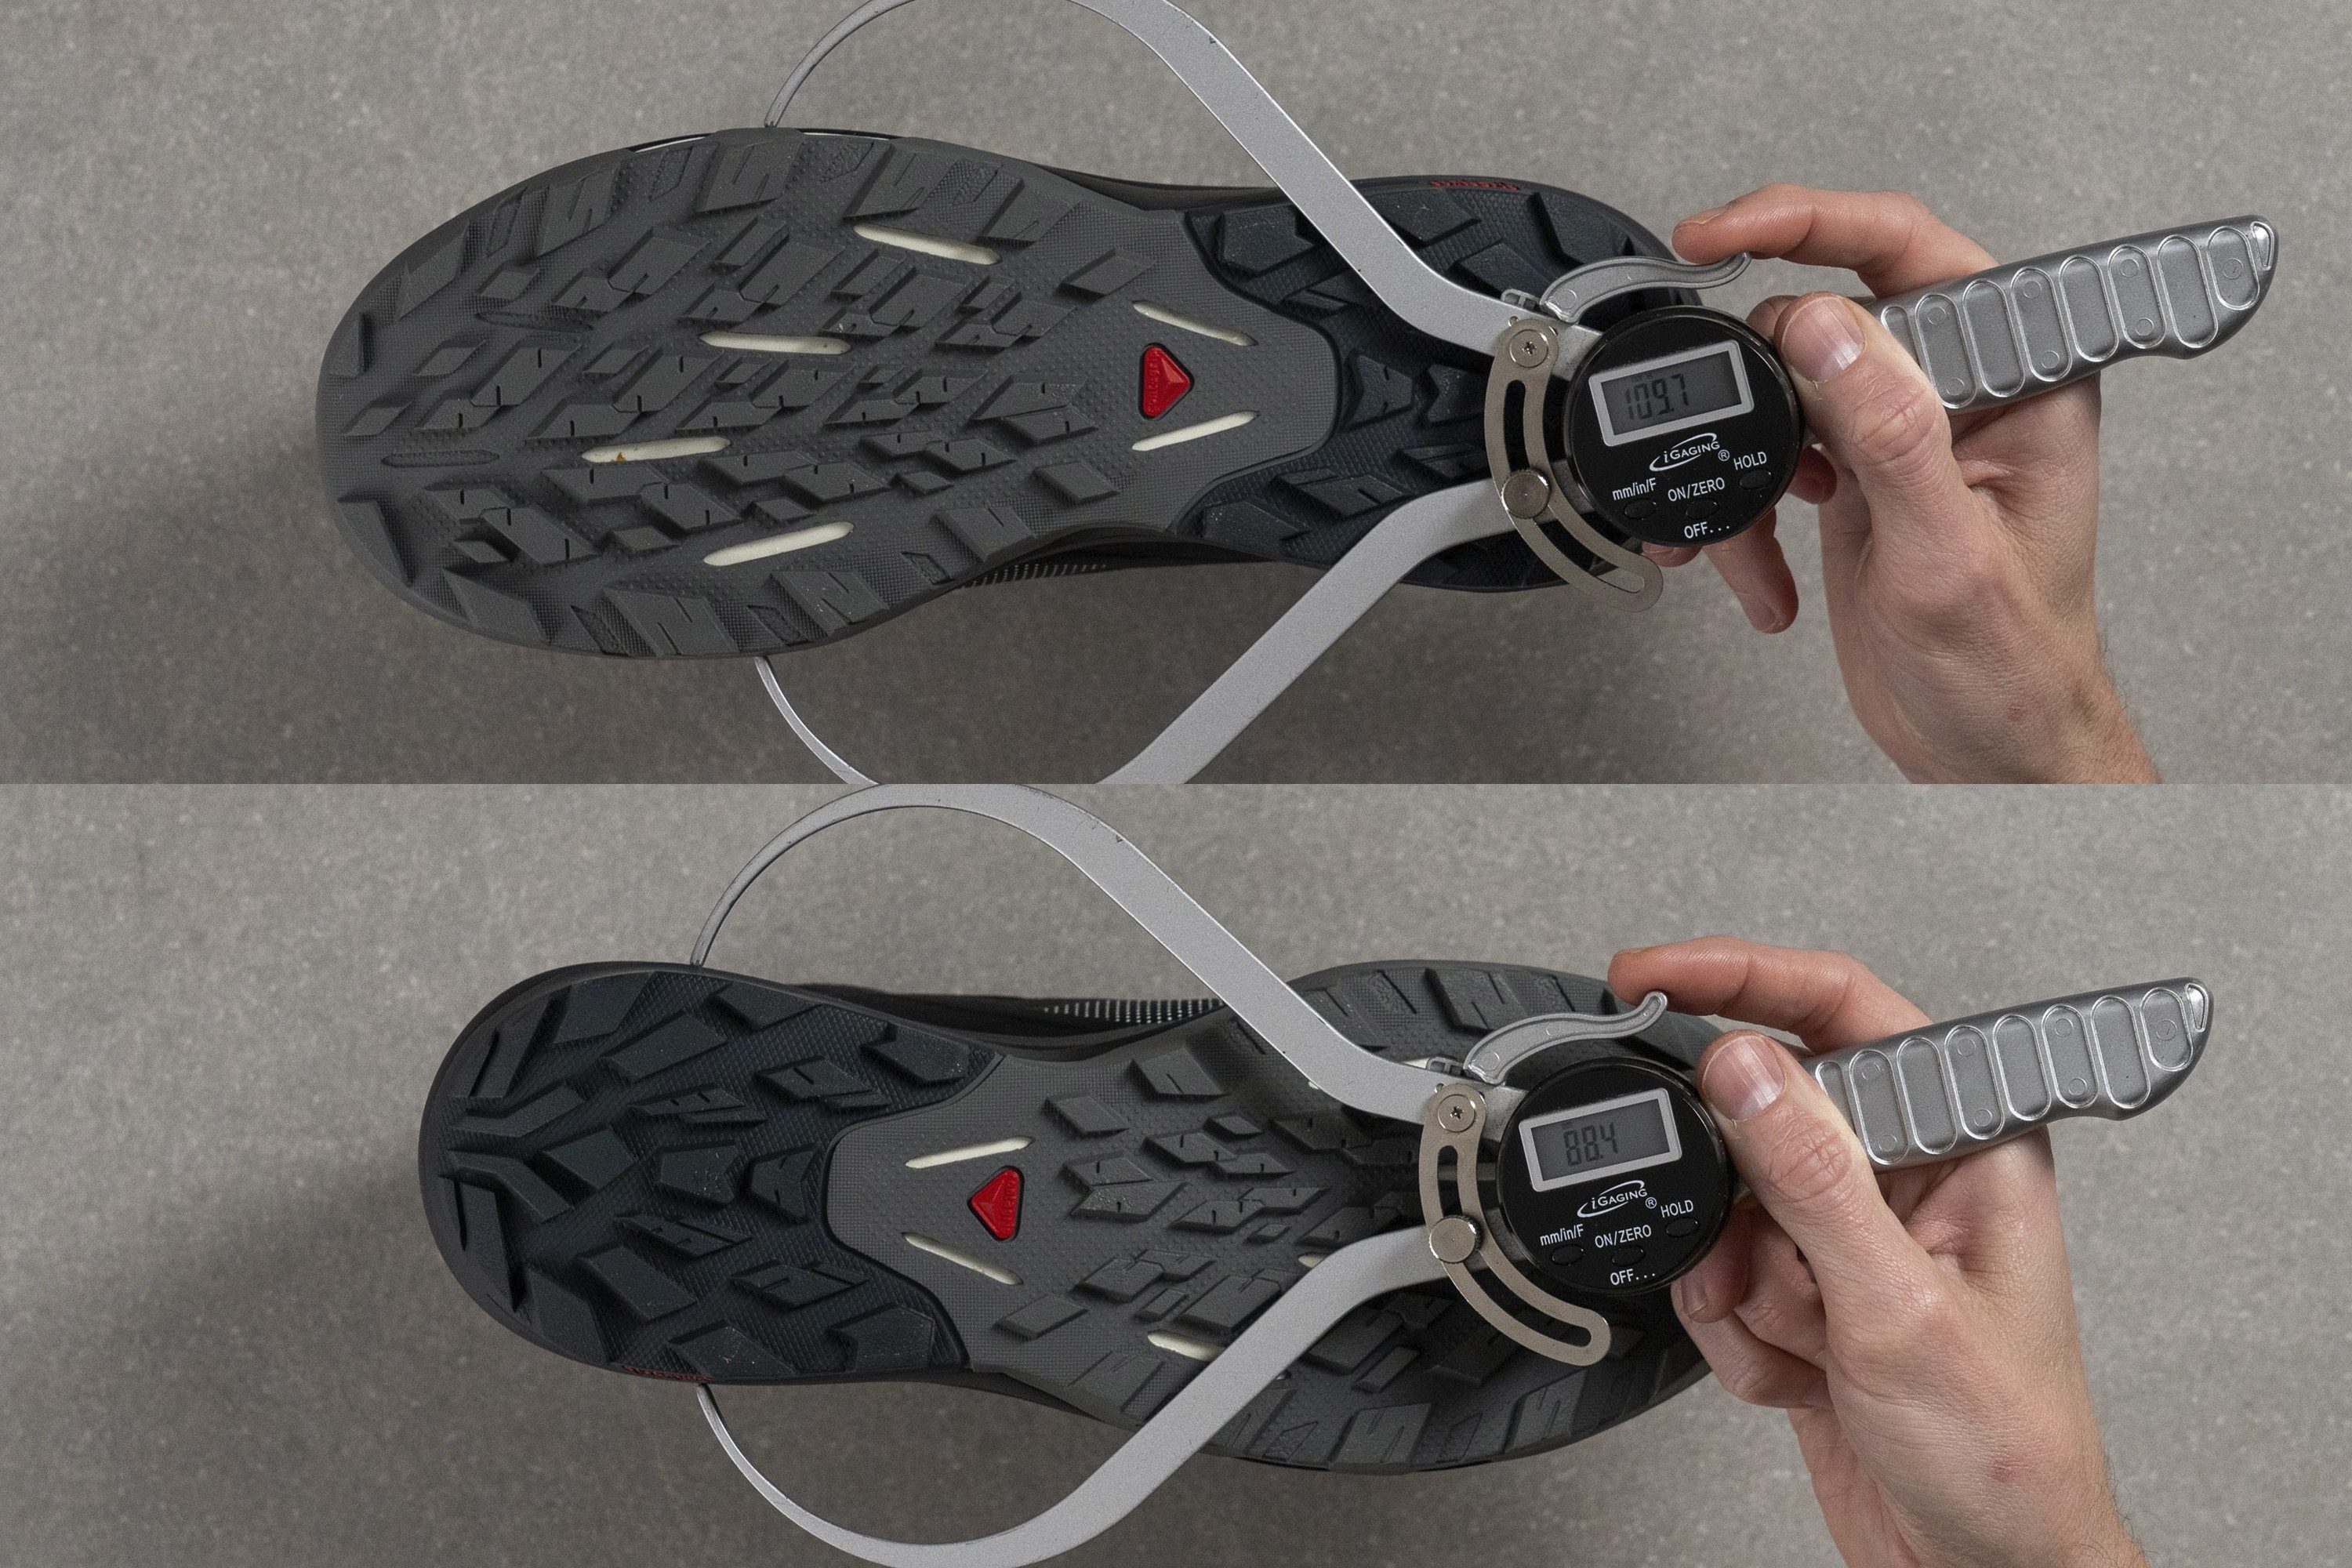
- Choose shallower lugs (less than 4 mm) if you plan to cover wet hard ground. Rocks, hard-packed gravel, etc.
- Choose average lugs (around 4mm) if you plan to do a bit of everything but nothing too demanding/extreme. These lugs should be denser.
- Choose deep lugs (thicker than 4 mm) if you plan to hike in muddy, snowy or slushy areas. These lugs should be spaced further apart to allow for better mud shedding.
In our lab, we always measure the thickness of lugs, so we’ve got you covered.
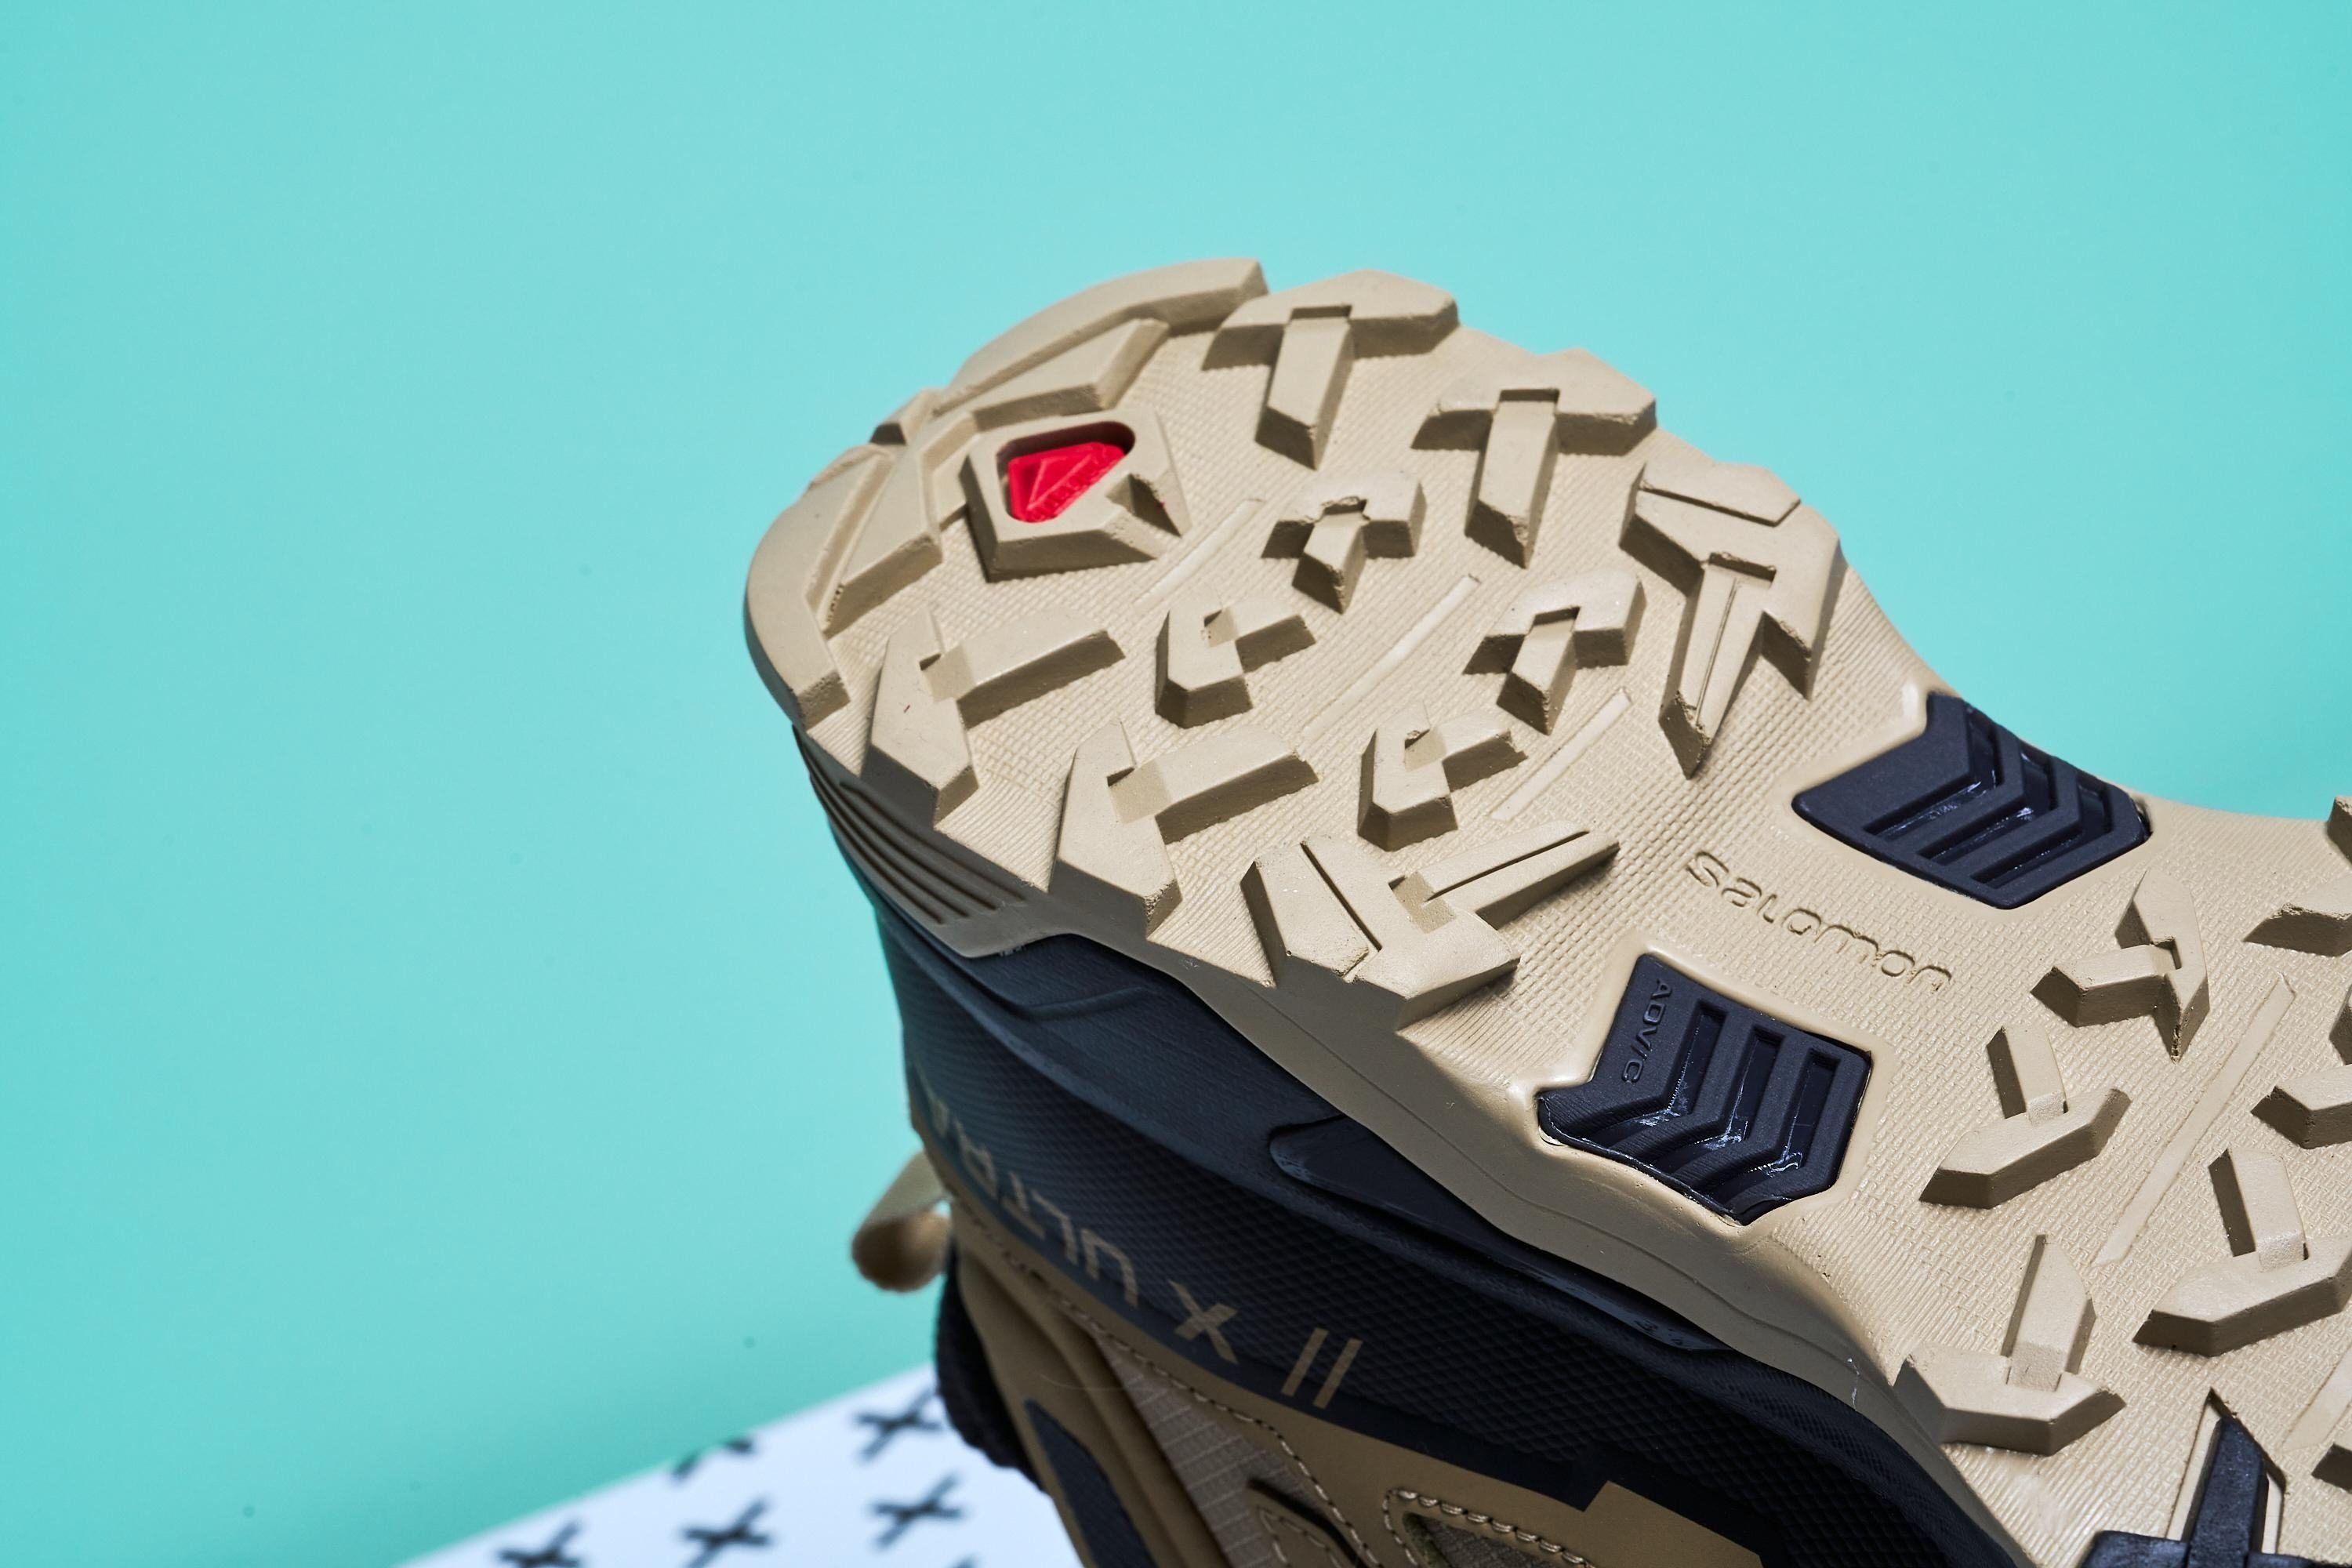
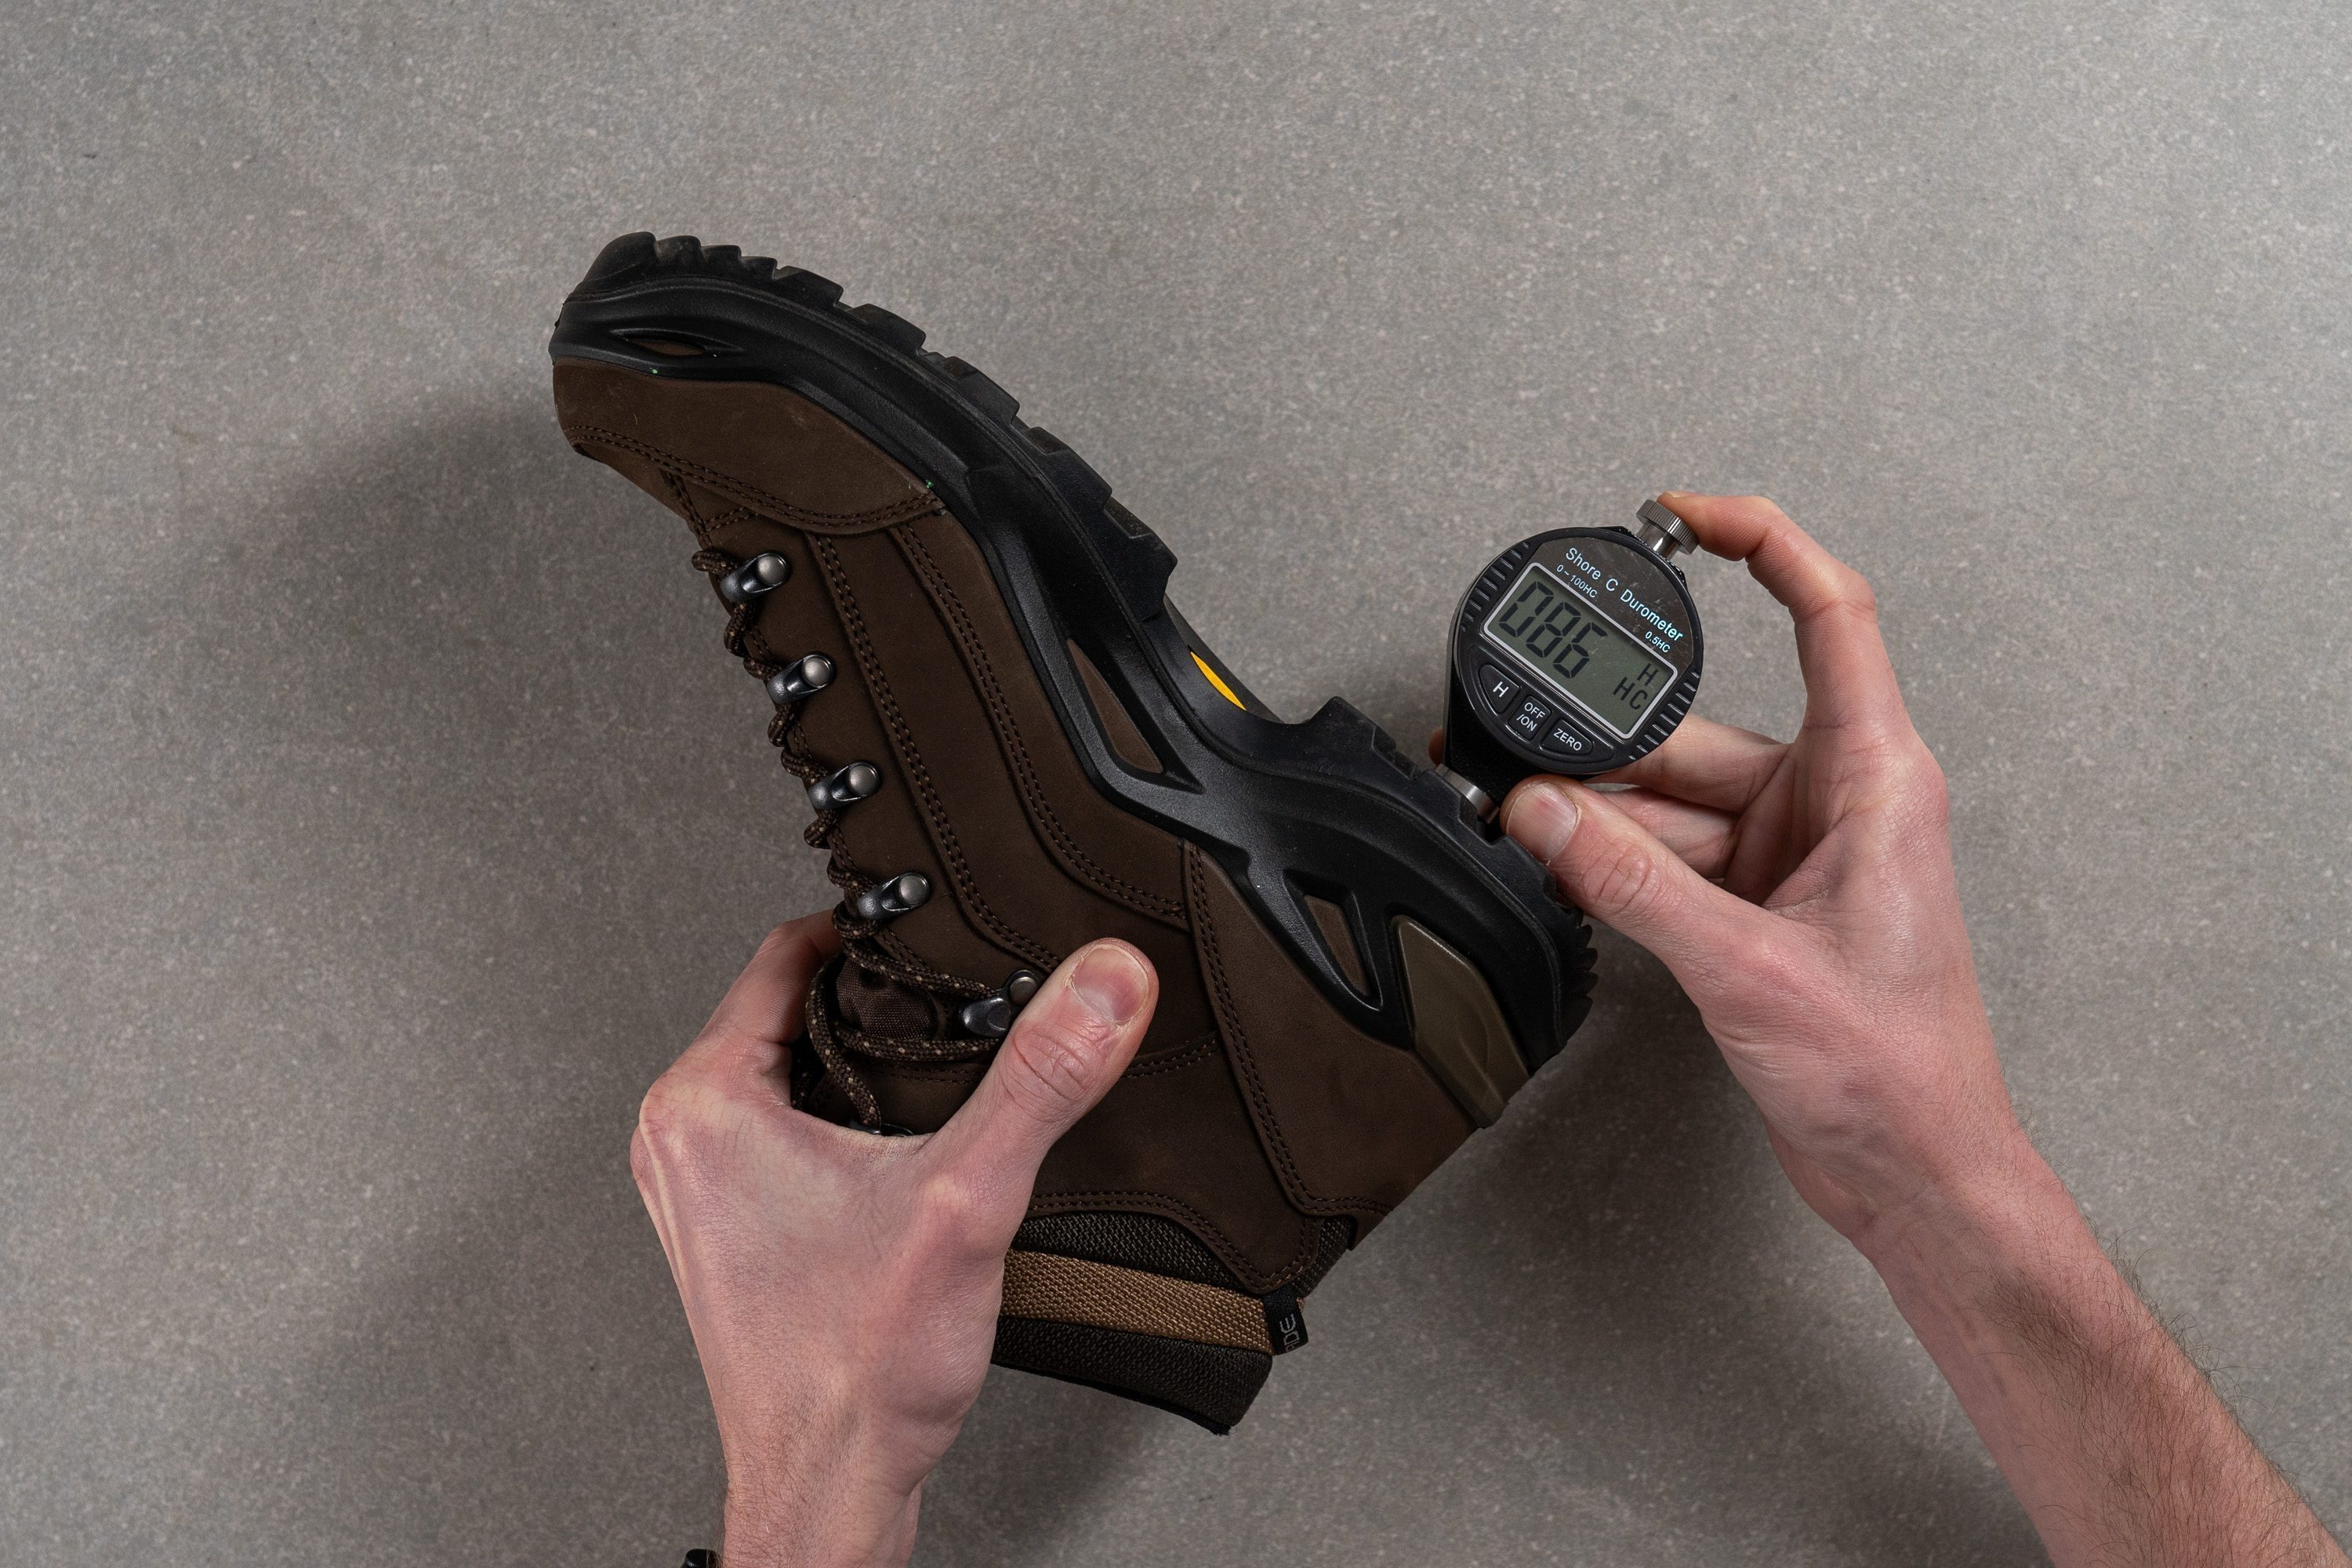
Grip is not about the lug thickness only, the hardness of the outsole rubber also plays a role. Generally, harder rubber offers more protection (from sharp rocks, debris) andis more durable. Softer rubber tends to be stickier but less durable, which is why it is not recommended to use soft outsoles on hard ground.
Another lab test and we’ve got you covered again. We use a durometer to measure the hardness of the rubber. The lower the number, the softer the rubber and vice versa.
Testing durability of waterproof hiking boots
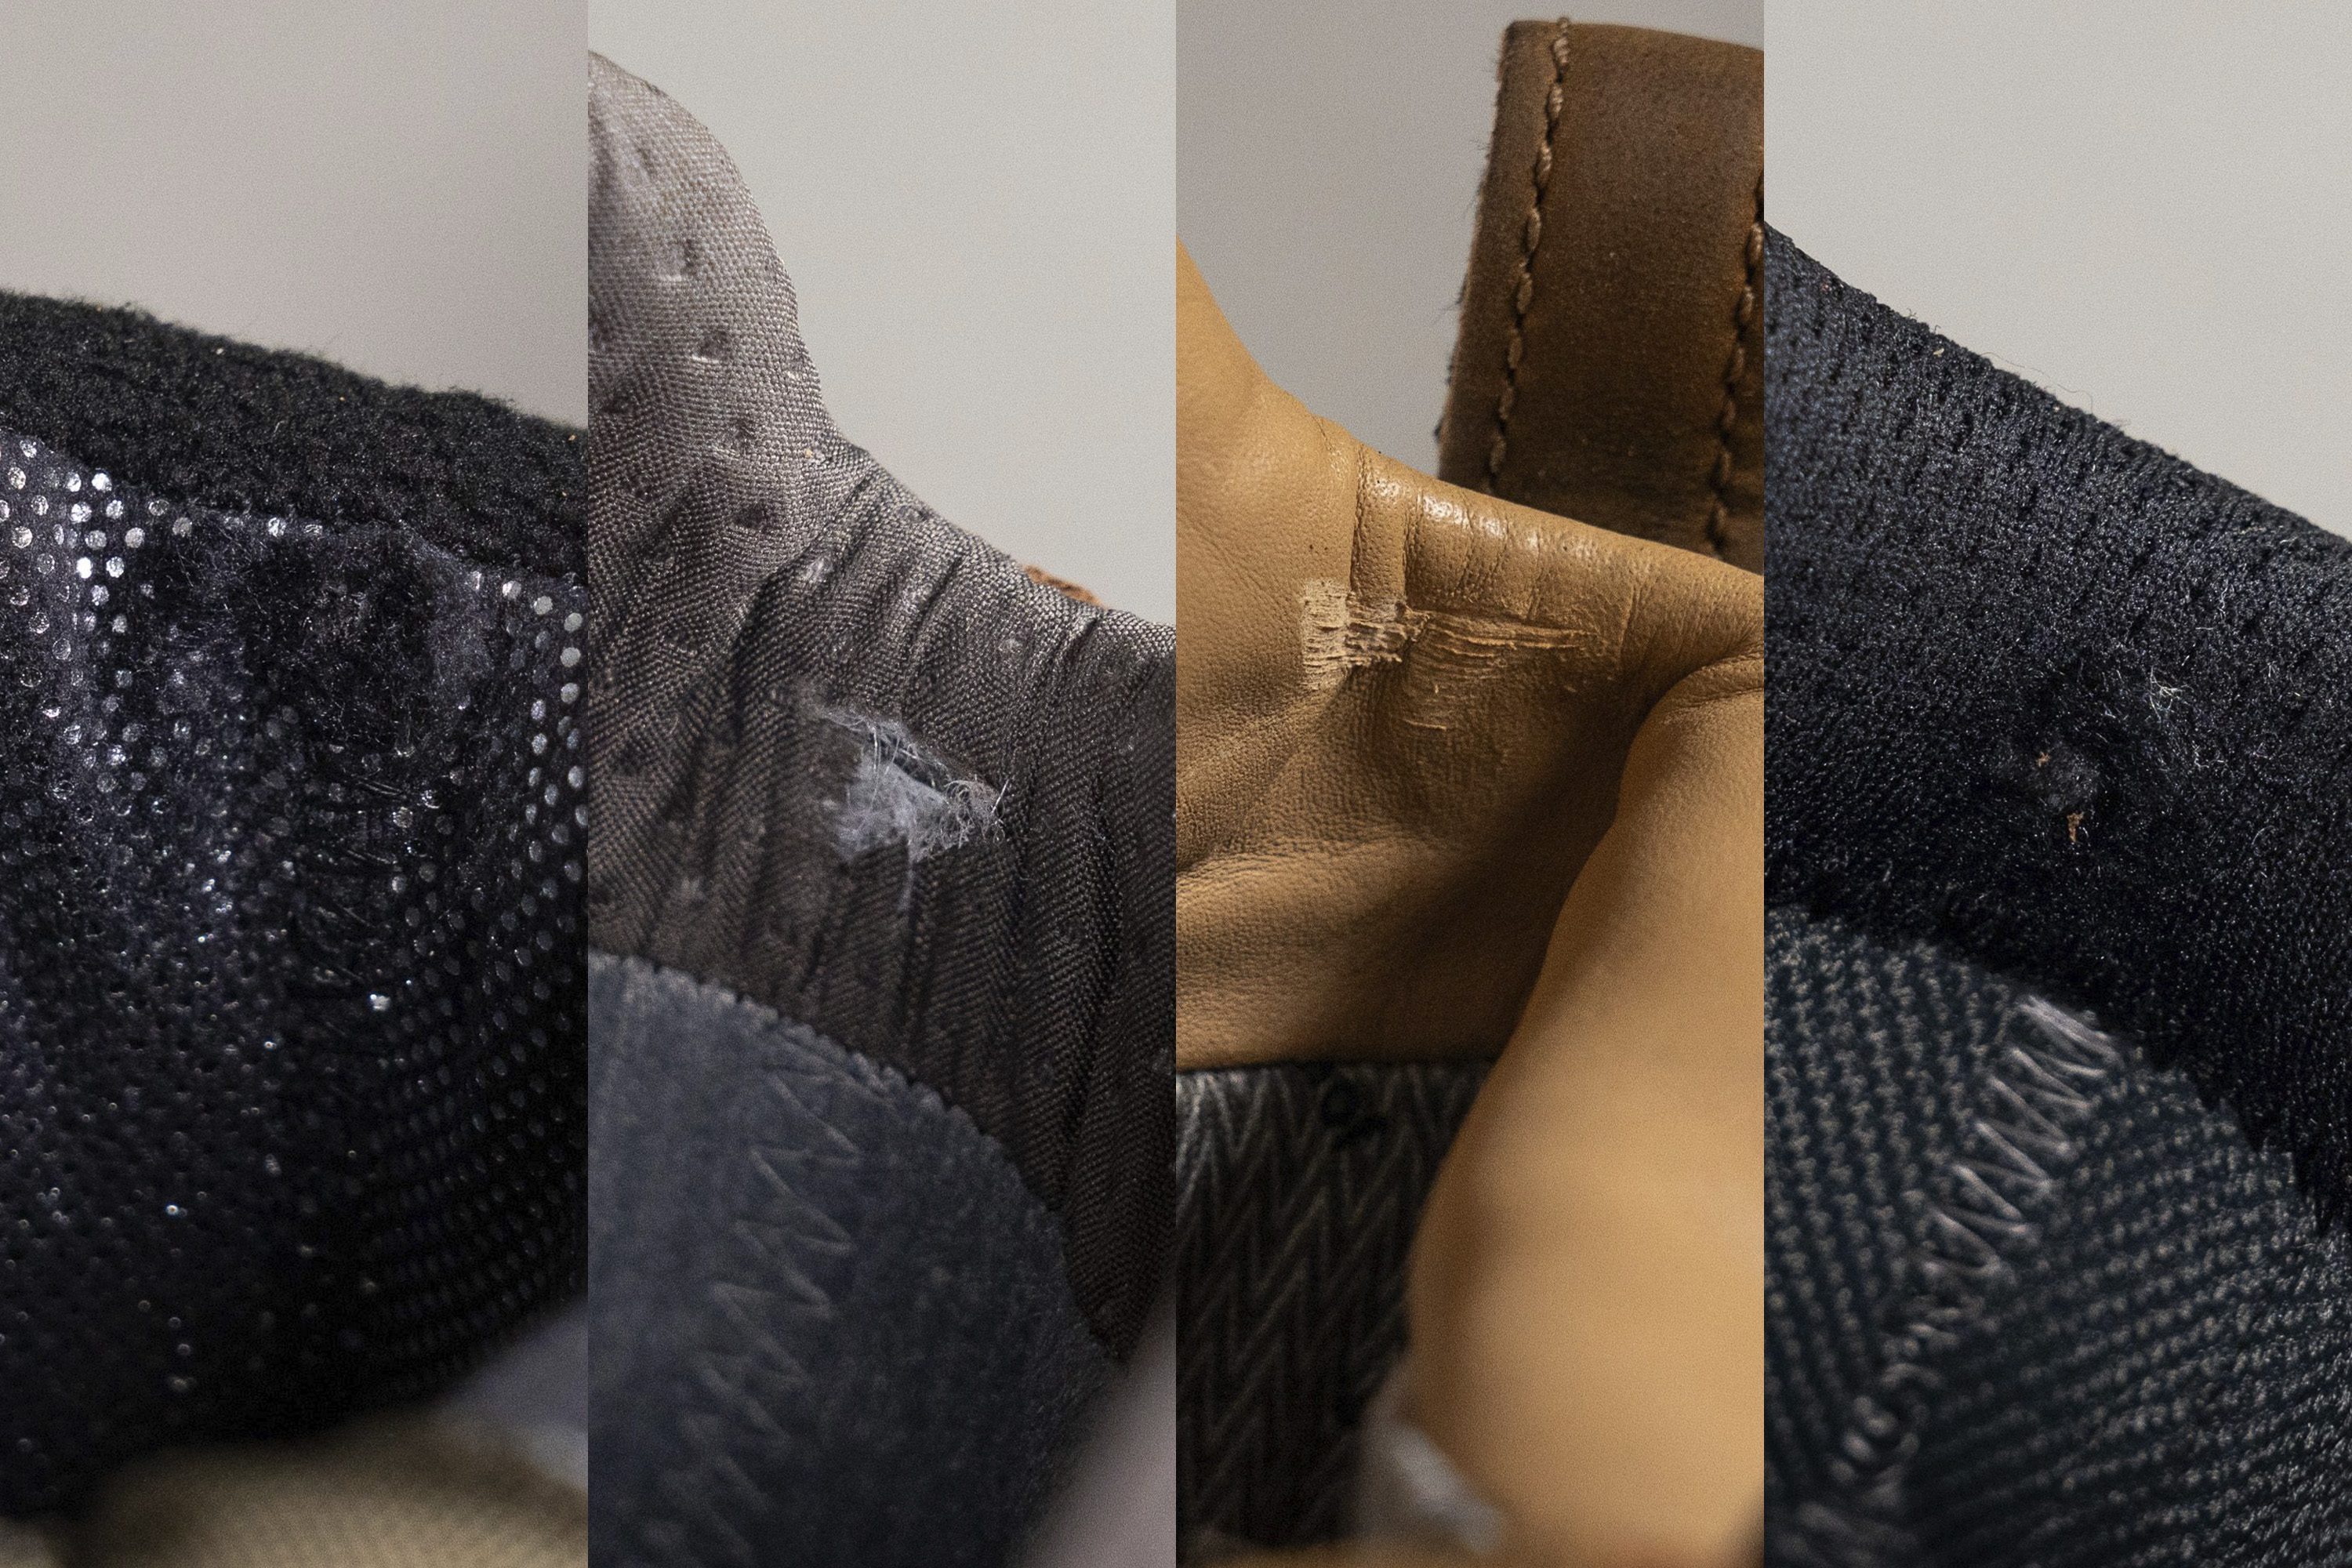
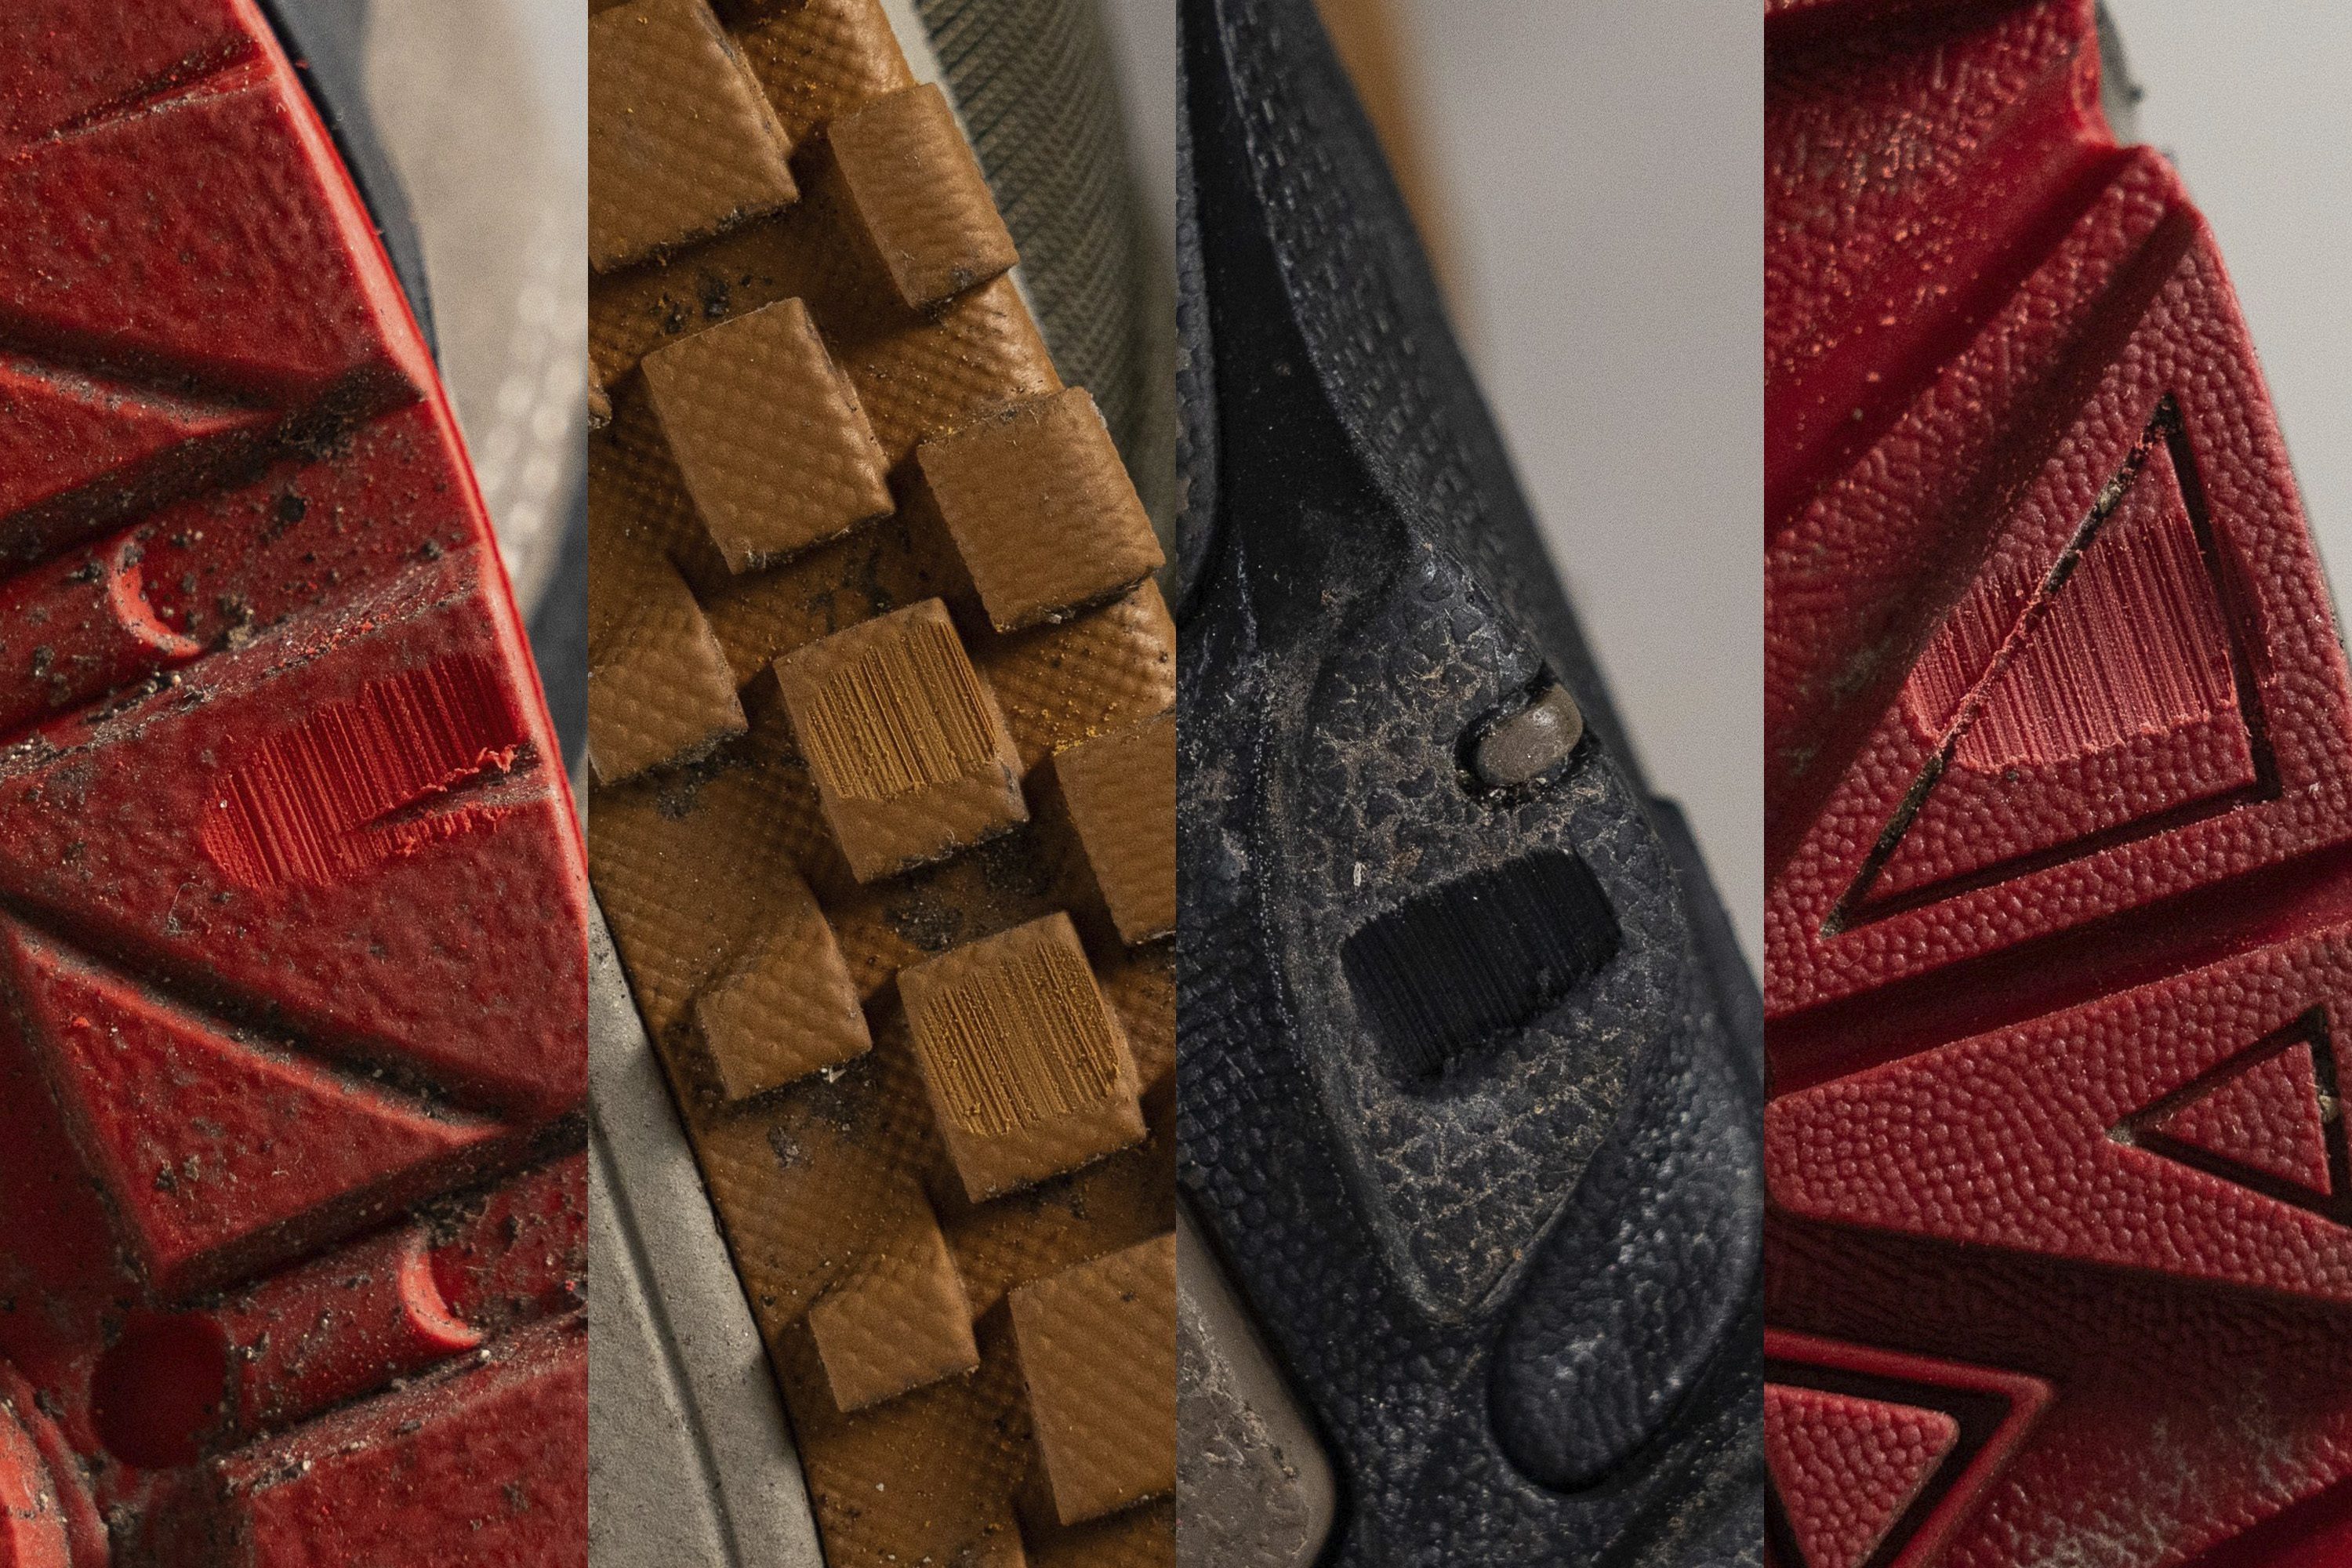
Hiking in wet weather can put the hiking boots to a very good test, one where durability comes to light. In our shoe lab, we test durability on 3 parts of the hiking boot: toebox, heel counter, and outsole.
In all 3 cases, we press a Dremel against the boot. In case of a toebox and heel counter durability, we assess the durability on a 1-5 scale based on the damage the dremel has made.
This way, toe boxes and heel paddings that have a rating of 1/5 for durability are the least durable and those rated 5/5 are the most durable.
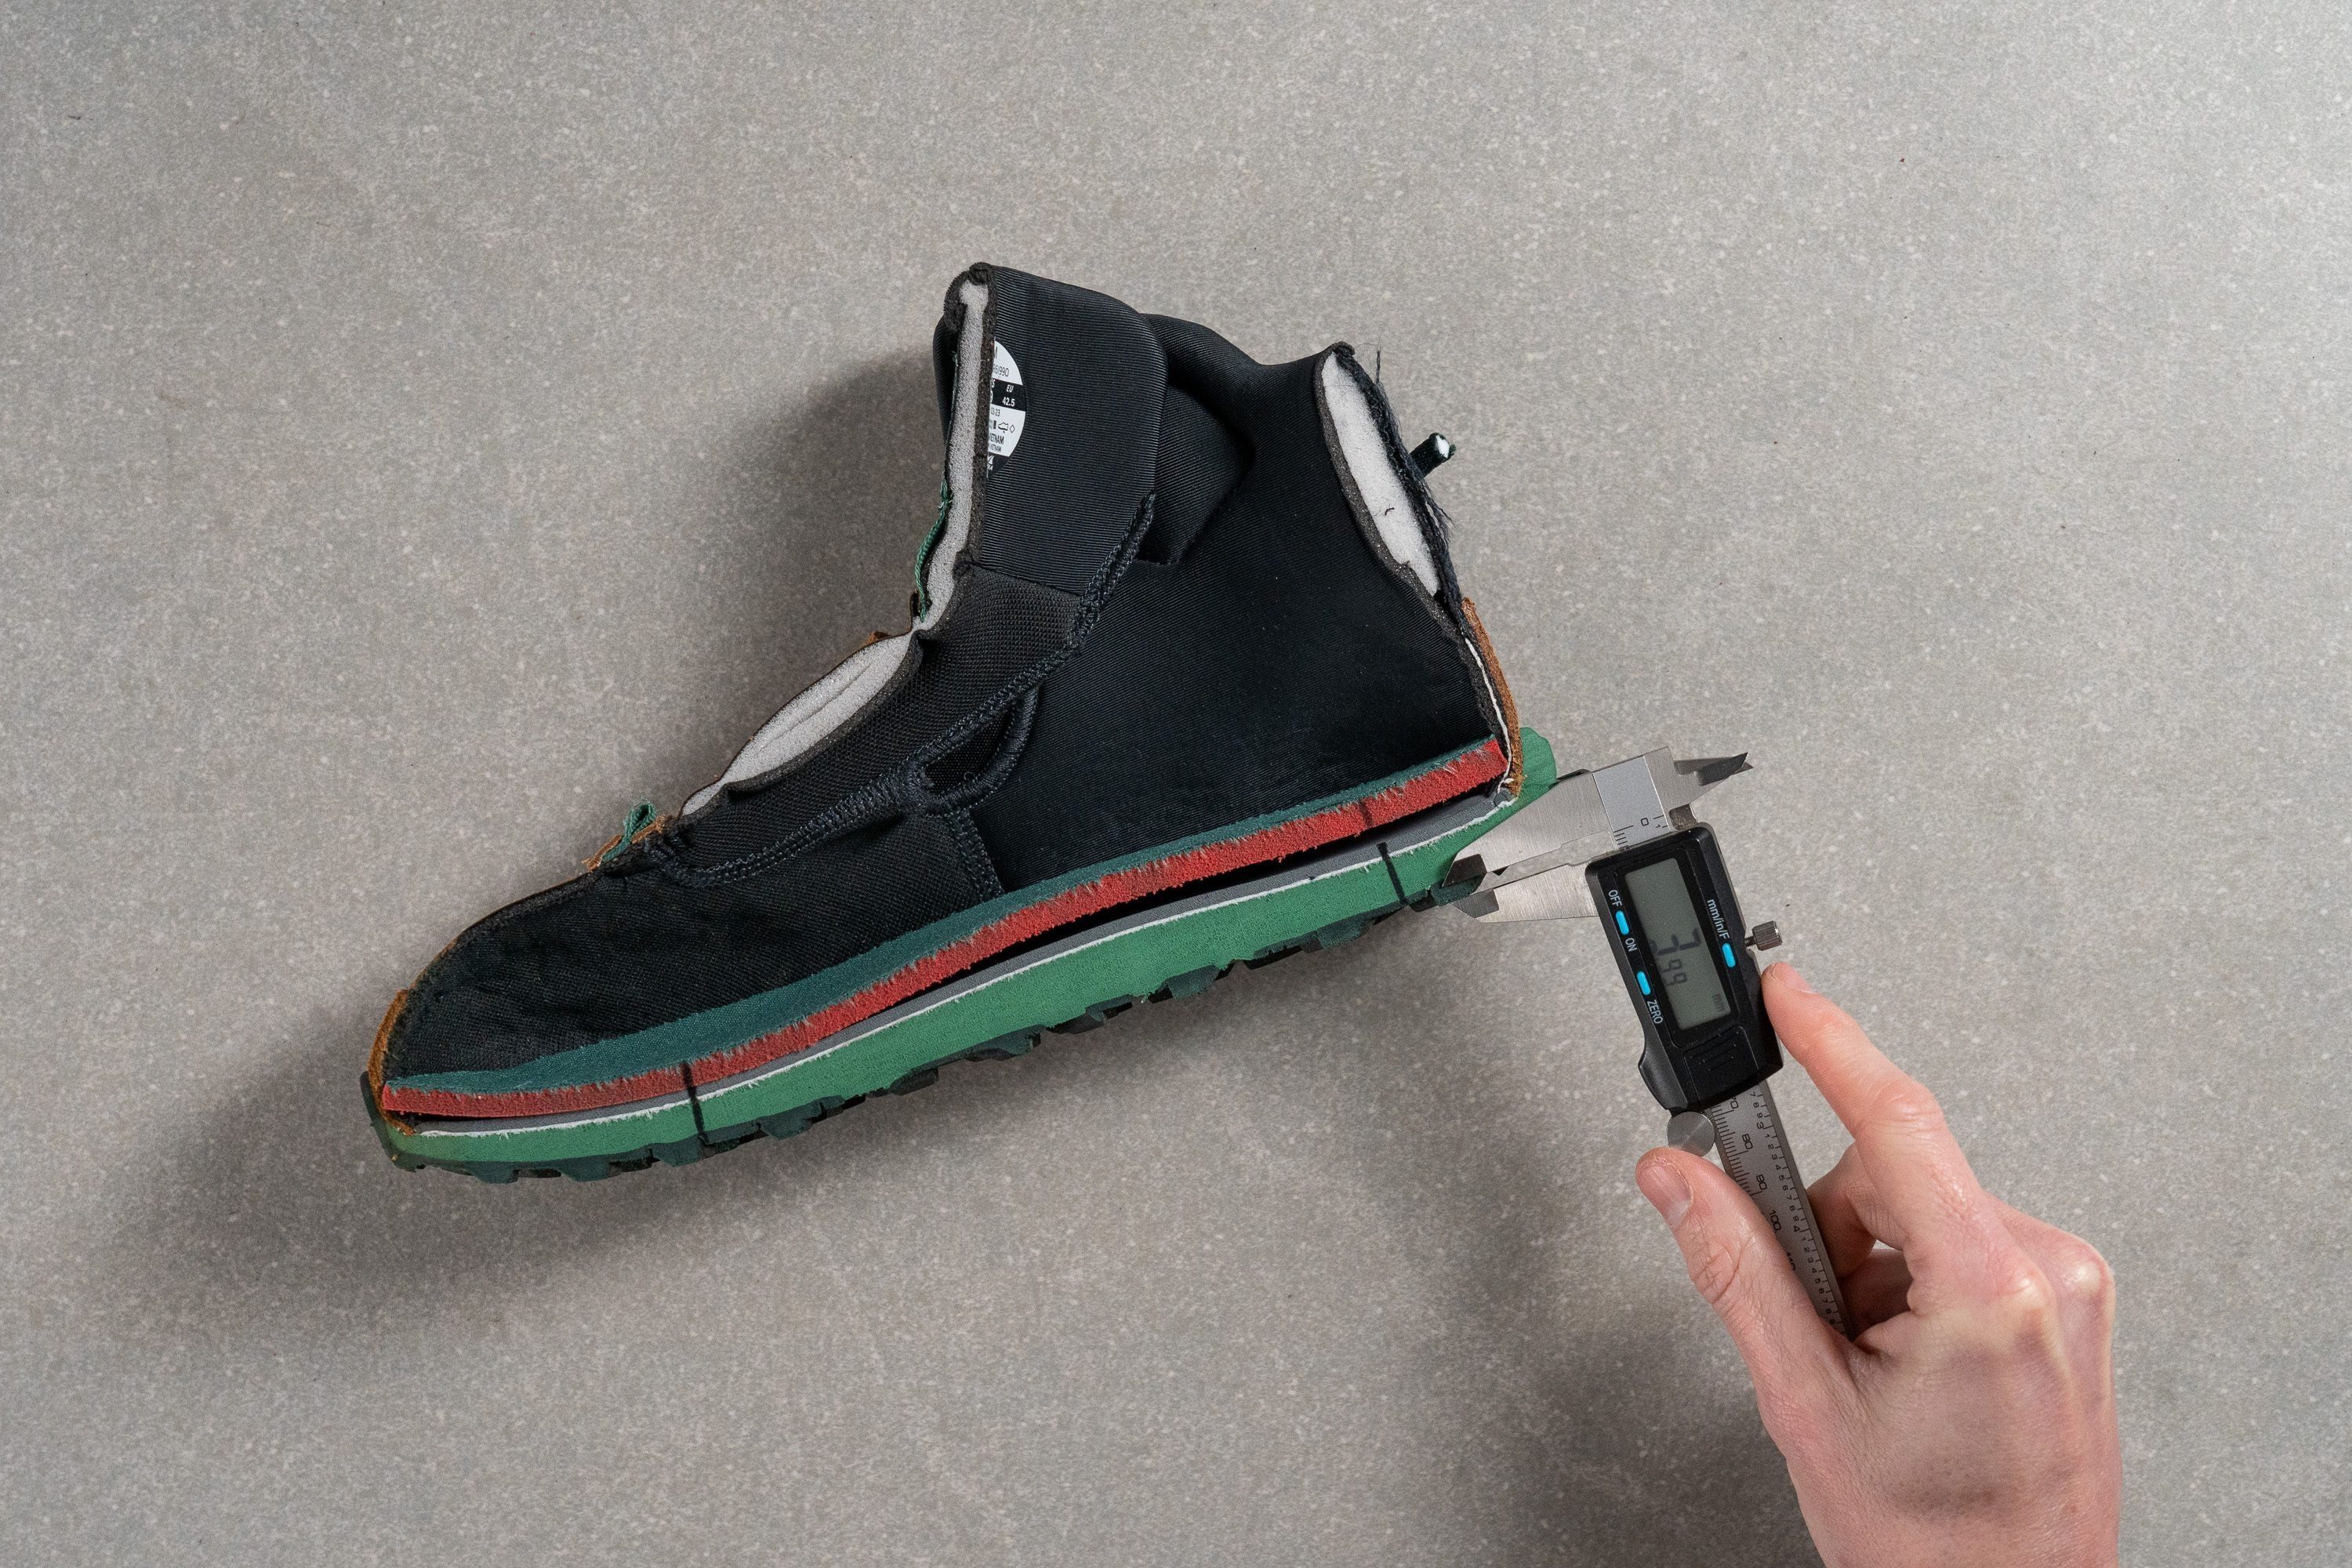
When it comes to the durability of the outsole, we use a tire tread gauge to exactly measure the dent made by the dremel.
The shallower the dent, the more durable the outsole is.
With this in mind, you can look for the most durable waterproof hiking boots and prioritize the durability that you want most.
Keep it STABLE when hiking in wet weather!
Stability is very important when it comes to hiking, especially when doing so in wet weather which means the terrain can be slippery.
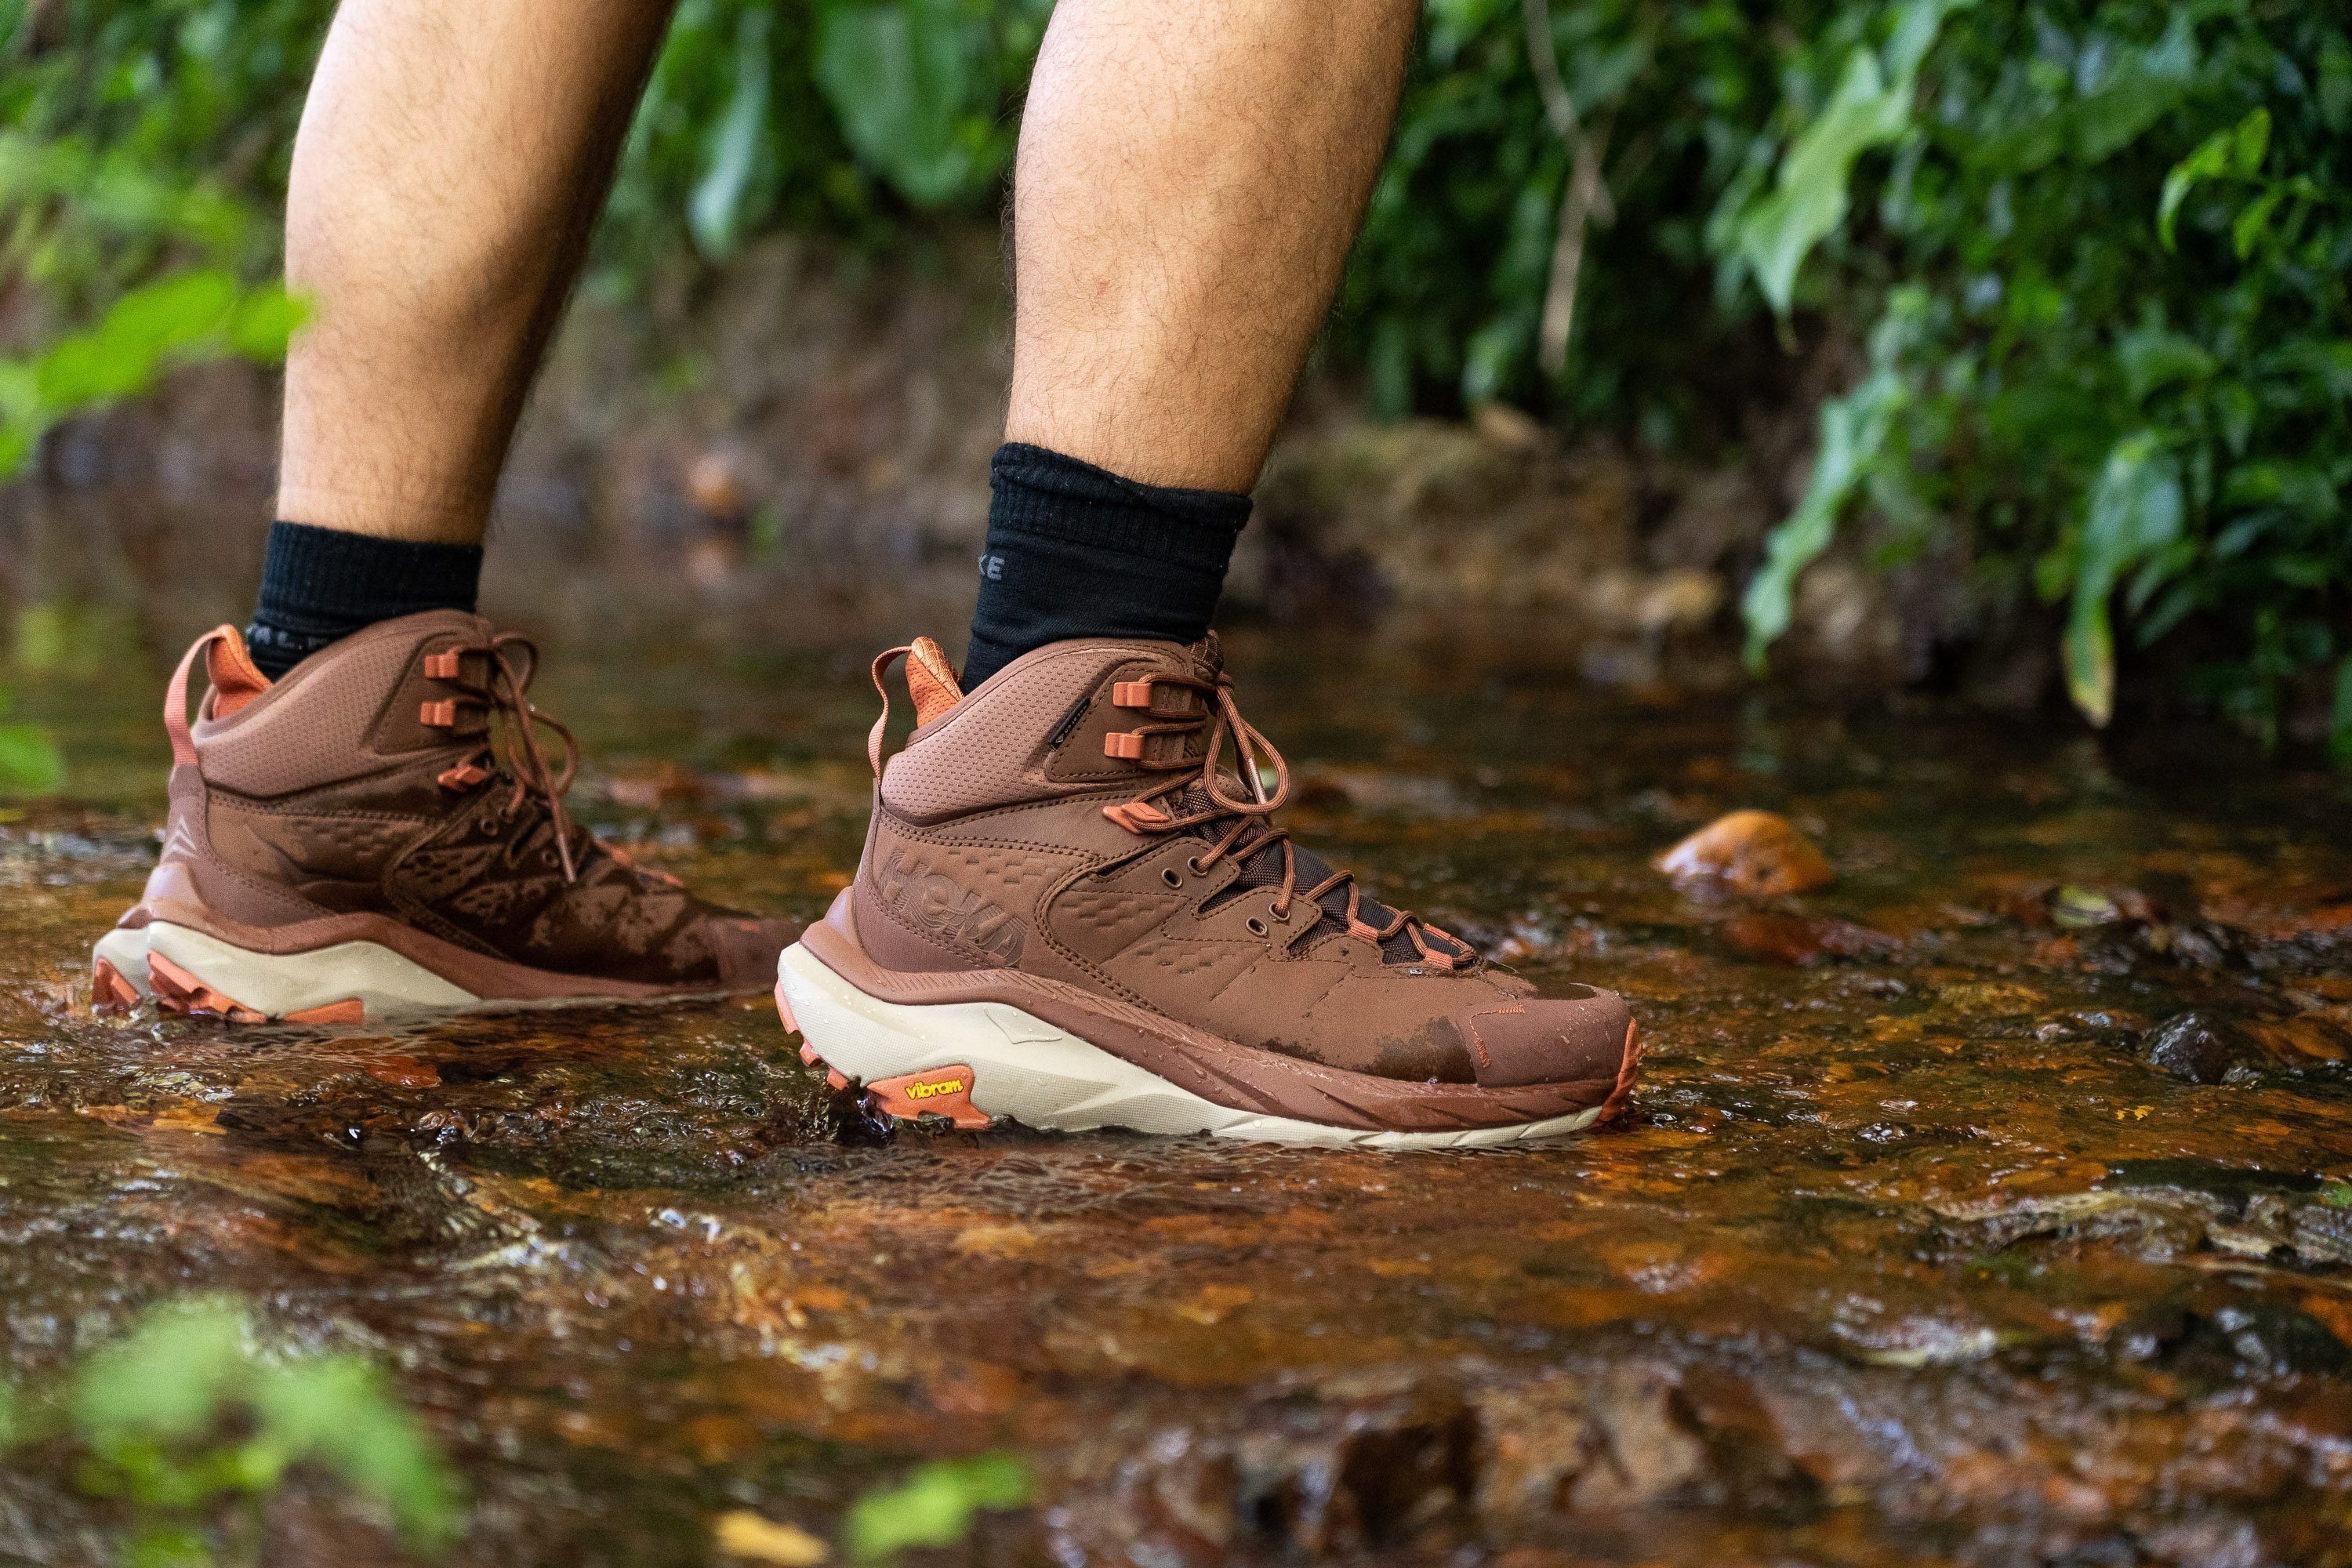
If you add a heavy backpack or uneven terrain to that, stability really gets prioritized!
On our test hikes, we always check whether the boot feels stable (lateral stability).
But, in the lab, the numbers that tell us whether the shoe is stable or not are measurements of the width of the base. Narrower and higher bases (midsoles) are easier to tip over, while wider bases allow us to feel planted and secure when hiking.
These are the top waterproof hiking boots that we tested with the widest midsoles:
Shock absorption of waterproof hiking boots
Shock absorption may not be the first thing that comes to mind when thinking about waterproofness but is surely a feature to take into account. It’s all about how good the midsole is at dampening the impact when you land on it. When hiking boots have very low shock absorption, it means that your legs will have to deal with much more of the impact forces, which puts significantly more strain on the legs.
In the world of hiking boots, we consider a shock absorption of at least 85 SA to be good, and above 100 SA great.
Not sure about the fit of your boots?
If you have never bought hiking boots before, it’s a good idea to stick to these guidelines:
- Try the hiking boots later in the day, afternoon or evening. We advise this because by then your feet are most likely swollen a bit from the full day of activities. Swelling happens on the hike as well, so best to try and replicate the conditions.
- When trying the boots on, take your hiking socks with you. Orthotics as well, if you’re using them.
- Once the boots are laced up, sense if there are any hot spots. There shouldn’t be any.
- You should have 1-thumb width of room in front of your toes when you glue the feet towards the back of the boots.
- Use the ramp if trying the boots in a specialized store. Walk up and down, sideways, over the rocks, artificial grass, etc. Your heel should not be slipping. Your feet should not be sliding inside the boots.
Also, keep in mind that most hiking boots need some breaking in. Don’t take them straight out of the box on a long multi-day hike.
Best socks for waterproof hiking boots
Given how lousy these boots scored on our breathability tests, look for socks that have moisture-wicking features. The best, in our experience, are those made of wool and bamboo.
We don’t recommend getting waterproof hiking socks in combination with waterproof hiking boots. The non-breathability of both is a recipe for disaster (blisters, at least).
link